I am Ari, a Concept Artists.
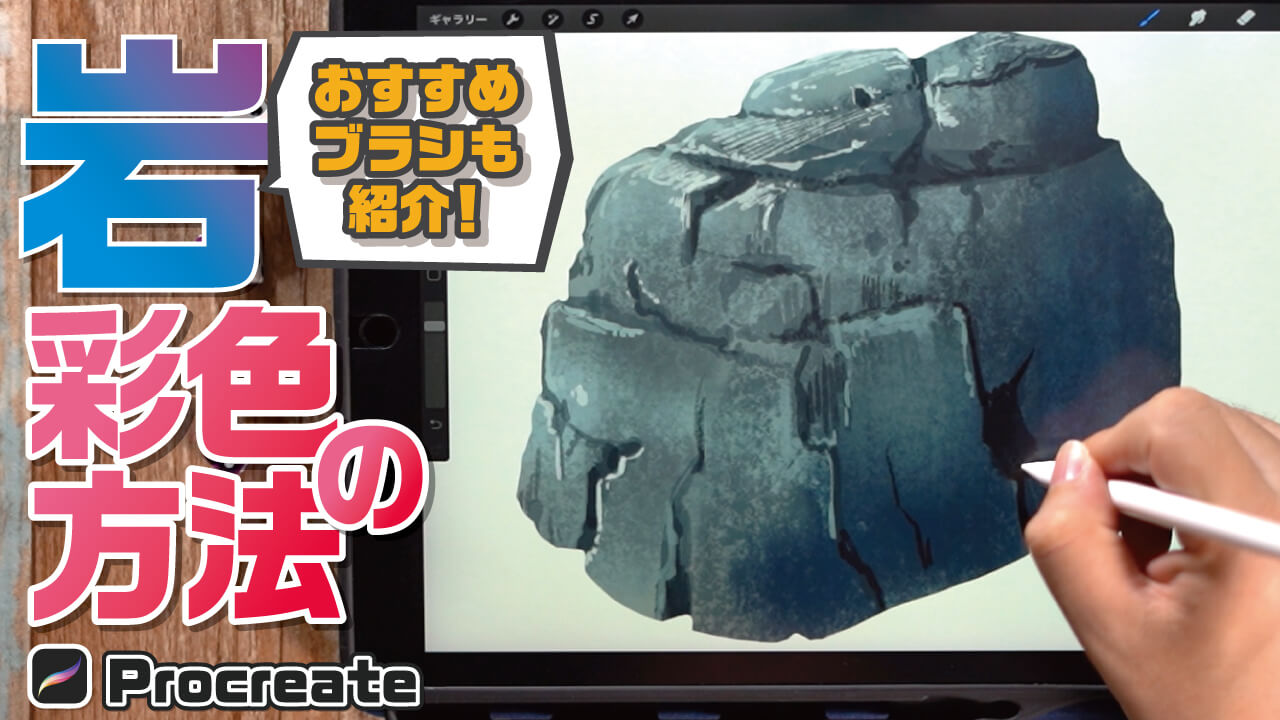
In this article, I would like to introduce “How to Color Rocks and Stones” which is an easy way to draw rocks and stones.
Rocks are also natural objects that make many appearances. By learning this method, you will be able to color rocks that can be used for backgrounds.
We will also introduce the Procreate brushes that we recommend for painting rocks. Try coloring rocks and stones using these brushes.
The equipment and apps used in this article are iPad and Procreate; please try Adobe Photoshop, CLIP STUDIO PAINT, and other apps as well, as you can also draw by applying the concept.
If you are not sure which illustration app to use, please refer to this page. Here is a summary of recommended apps.
The video provides detailed explanations. If you want to check it out thoroughly, please click here.
[adchord]
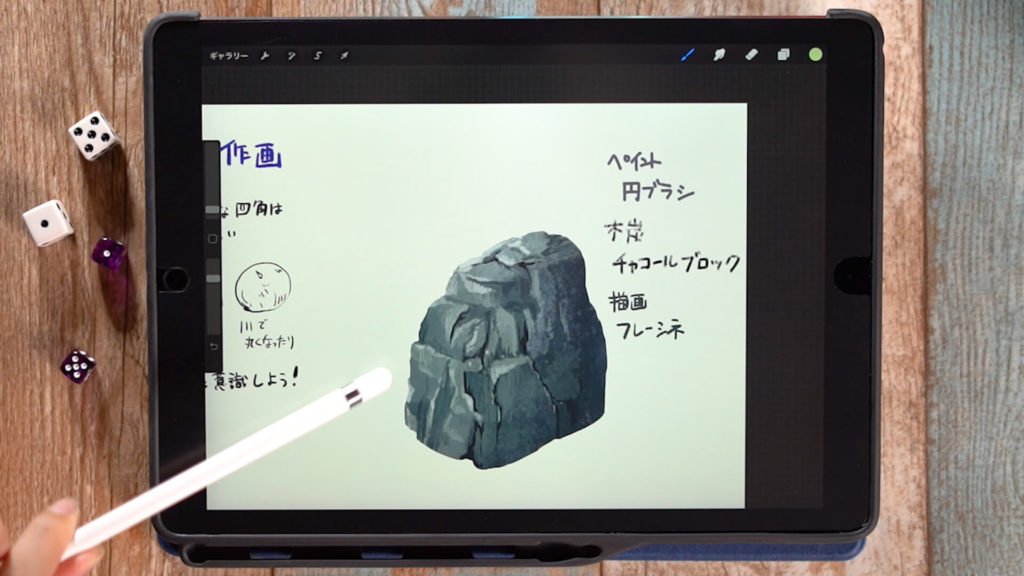
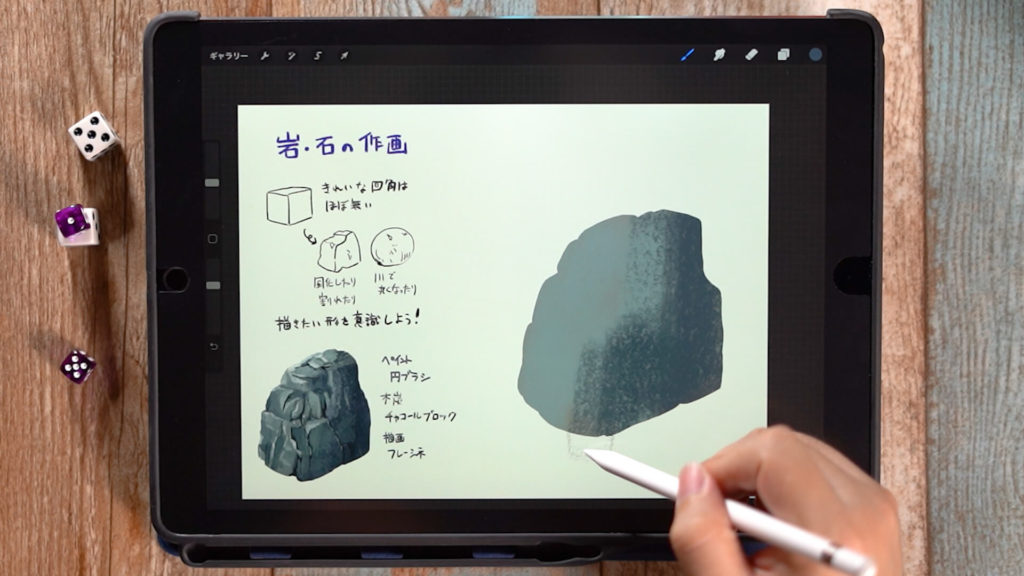
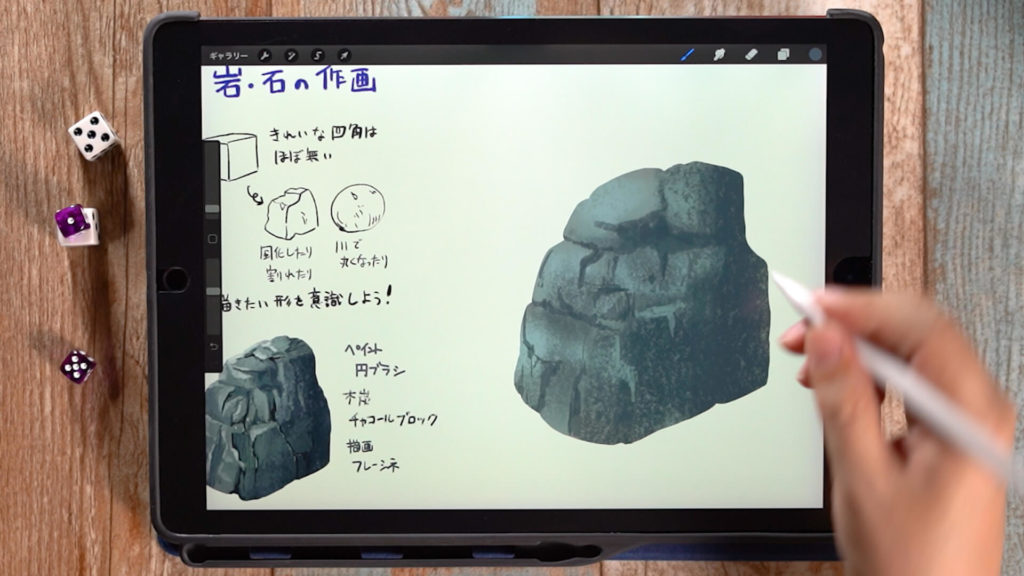
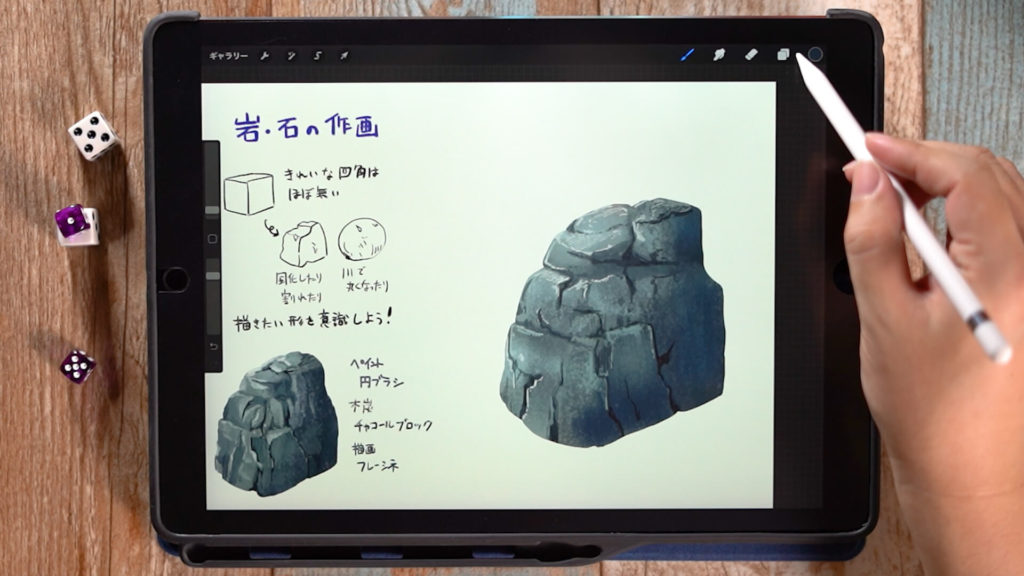
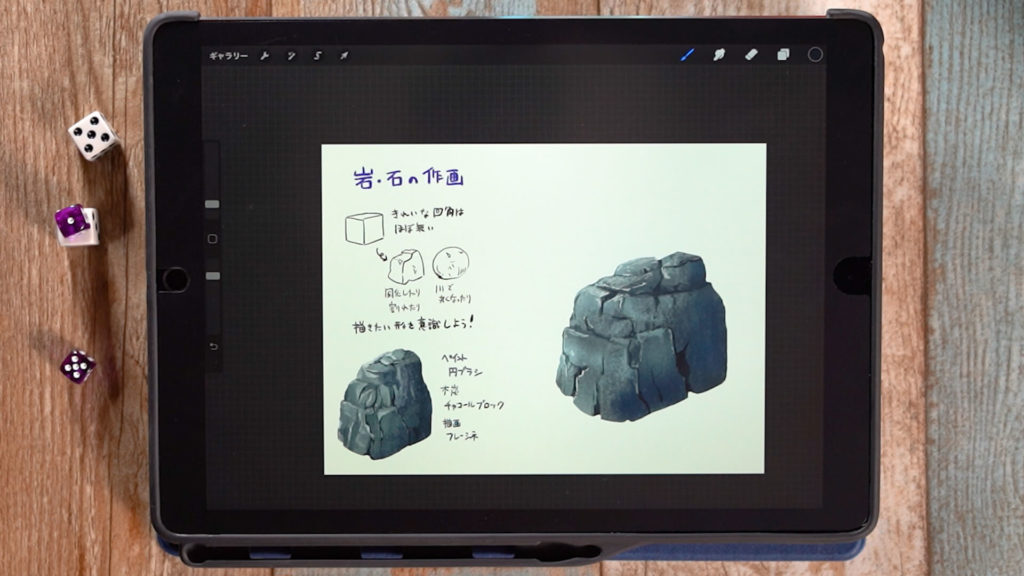
Types of Rocks and Stones

Rocks and stones are usually weathered, cracked, or rounded by rivers, so there are almost no beautiful square shapes.
It is important to first be aware of the shape you want to paint.
Recommended brushes for drawing rocks and stones
Here are some brushes for Procreate. For other apps/software, please find similar brushes for reference.
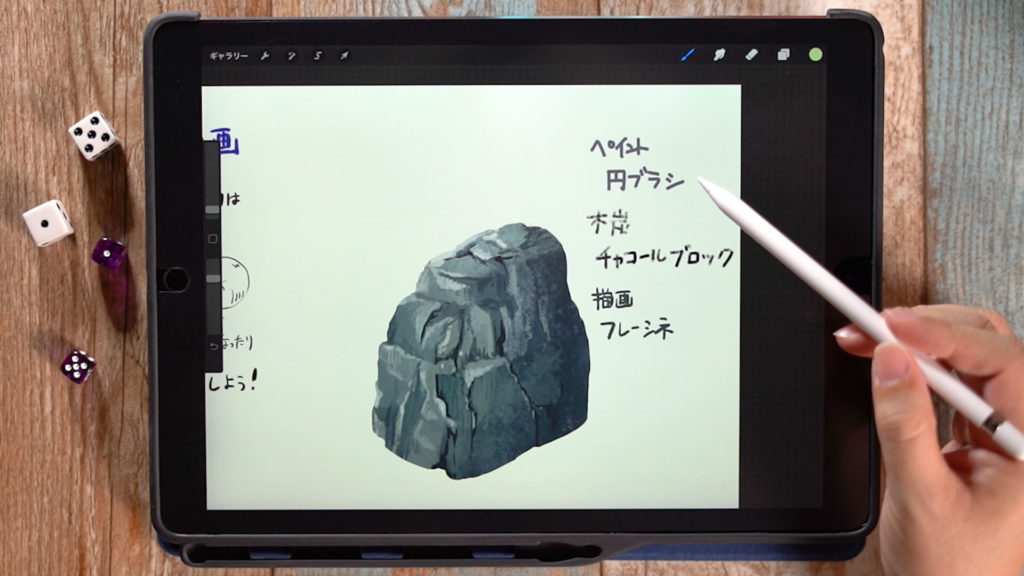
You can use the following three types to draw this kind of illustration.
“Paint”→”Circle Brush”
“Charcoal”->”Charcoal Block”
“Drawing”->”Frescine”
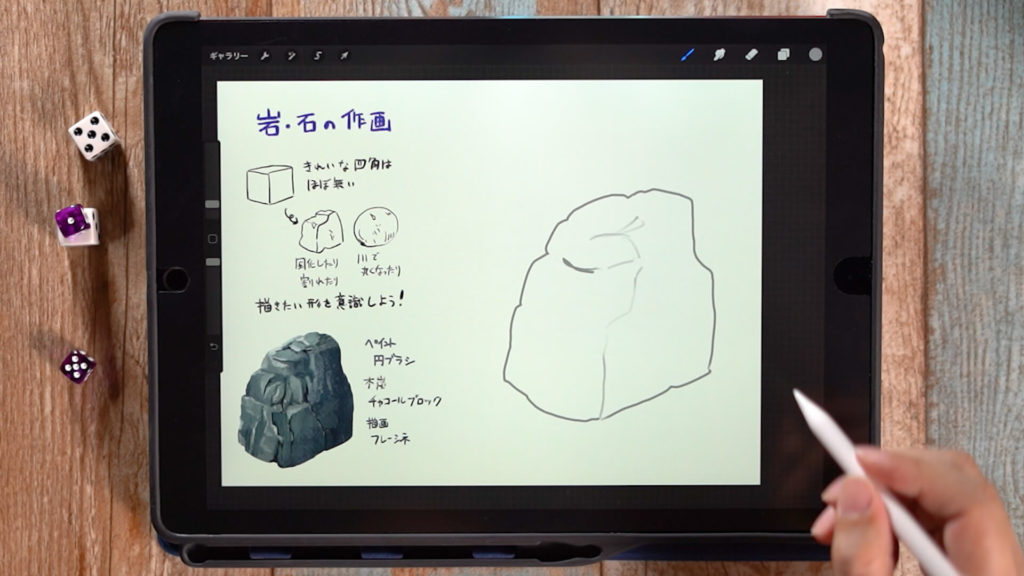
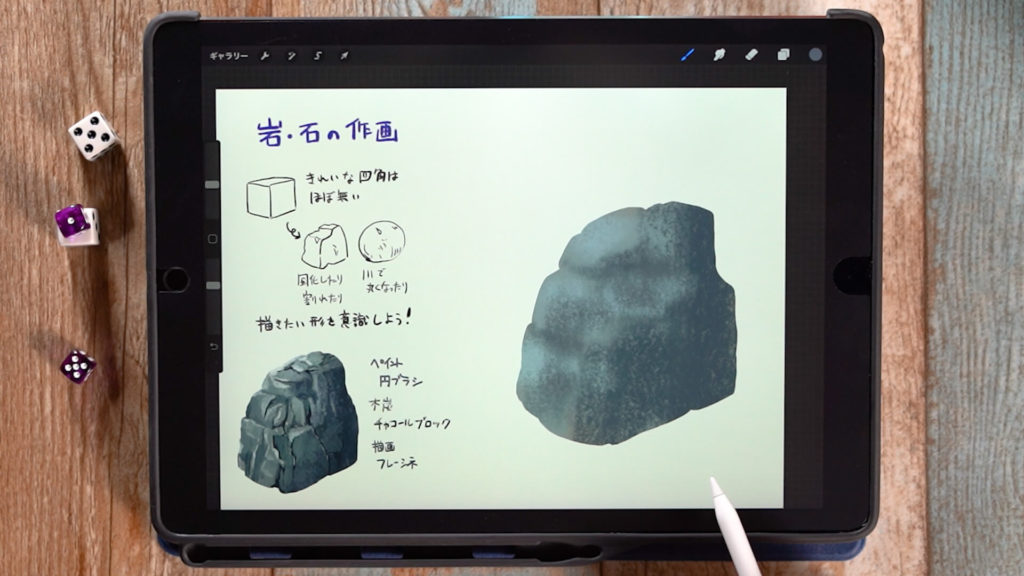
How to Draw Rocks
Before Painting
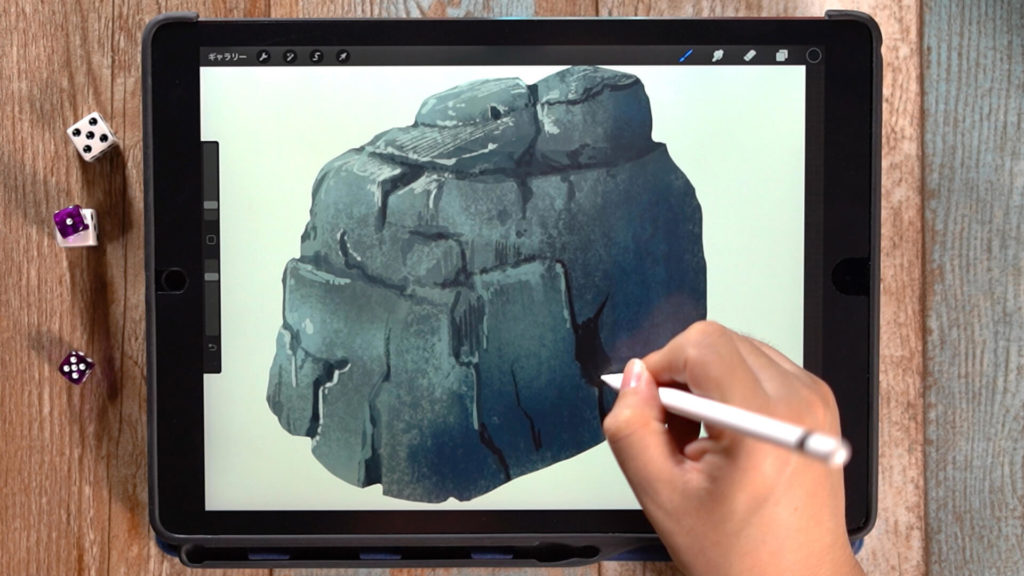
Before drawing, think about where the light is coming from.
In the case of the rock in this drawing, the light is shining from the upper left corner, so the upper left corner is bright and the lower right corner is dark with shadow.
It is not necessary to add much detail to the shadows. If you draw in too much detail, it will be difficult to tell where the main subject is, so draw in the areas you want to show (the areas where the light is hitting).

Also, since the rock is made up of a combination of bumpy surfaces, alternately draw light and shadow, and think about which surfaces are visible.
When drawing, check the reference materials before drawing.
[adchord]
Drawing the shape of the rock (creating the groundwork)
Use the “Paint” brush and then the “Circle Brush” to get the general shape of the rock.
In this case, we are drawing with a line drawing, but you can also take the silhouette by painting.
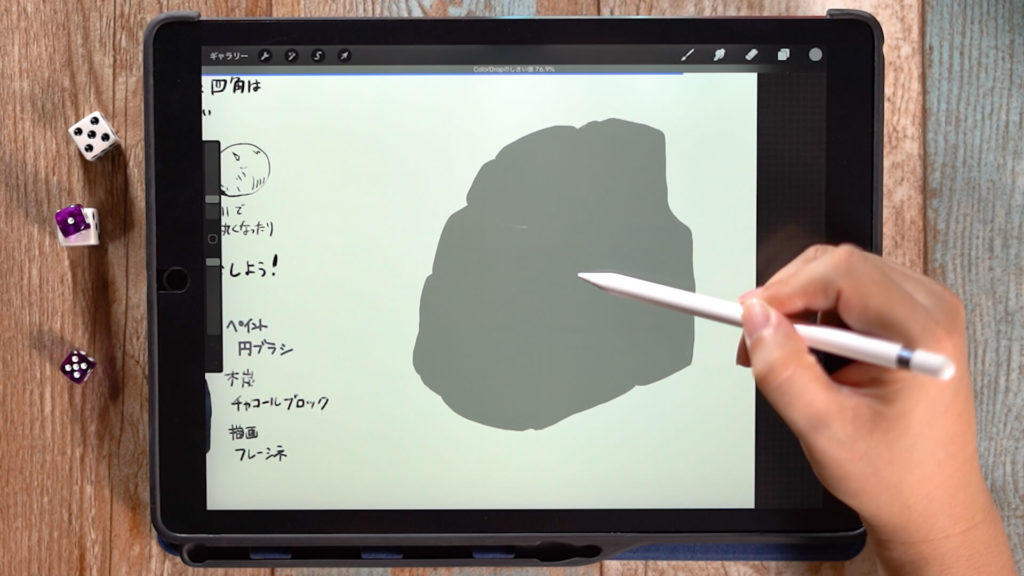
If you drew it as a line drawing, drag it from the color selection area in the upper right corner to the area you want to fill in and apply the color.
Fill in the ground coat.
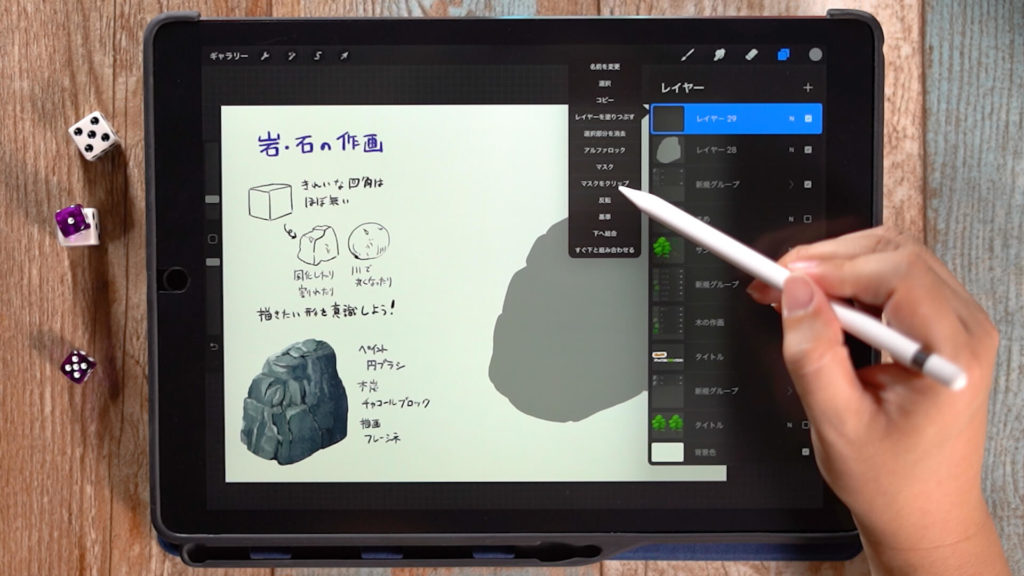
Create a new layer on top of the base layer, click on the layer, and select “Clip Mask”.
This setting will allow you to color in only the areas you are drawing on the layer below.
Use the “Charcoal” -> “Charcoal Block” brush to apply the ground coat. The brush can be painted with a rough, rock-like texture.
This process will put color in each of the roughly lit and shadowed areas.
Putting in the shadows
Create a new layer on top of the ground paint and “clip” the mask.
Use the brush “Paint” -> “Frescine” and paint the shadows in detail. The brush has a fine, rough texture.
Reduce the transparency a little and put shadows in the stepped areas. Alternate vertical and horizontal strokes to get a good feel.
The strokes should be placed in small increments. The shadow is used to express the broken parts.
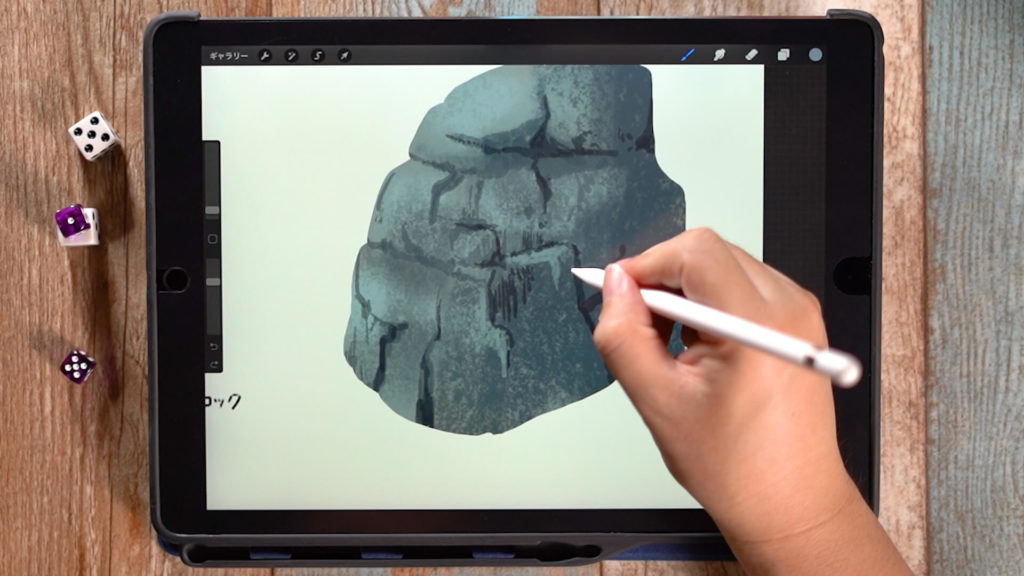
Add another layer of darker shadow.
[adchord]
Add highlights.
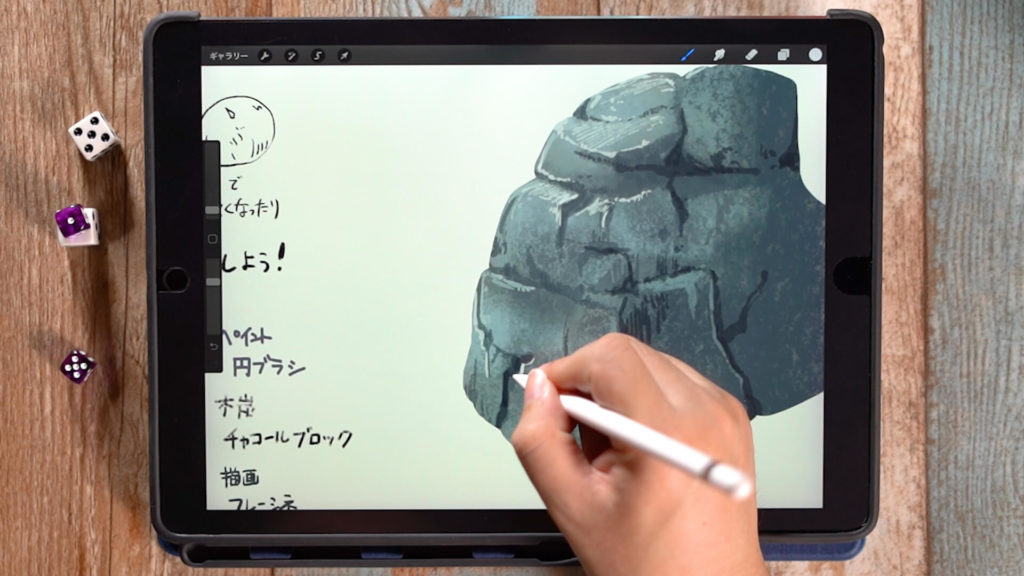
Use the same brush to highlight the bright areas.
The reflective areas are also highlighted with fine strokes. To check the overall balance, it is a good idea to draw the image while reducing the size of the image from time to time.
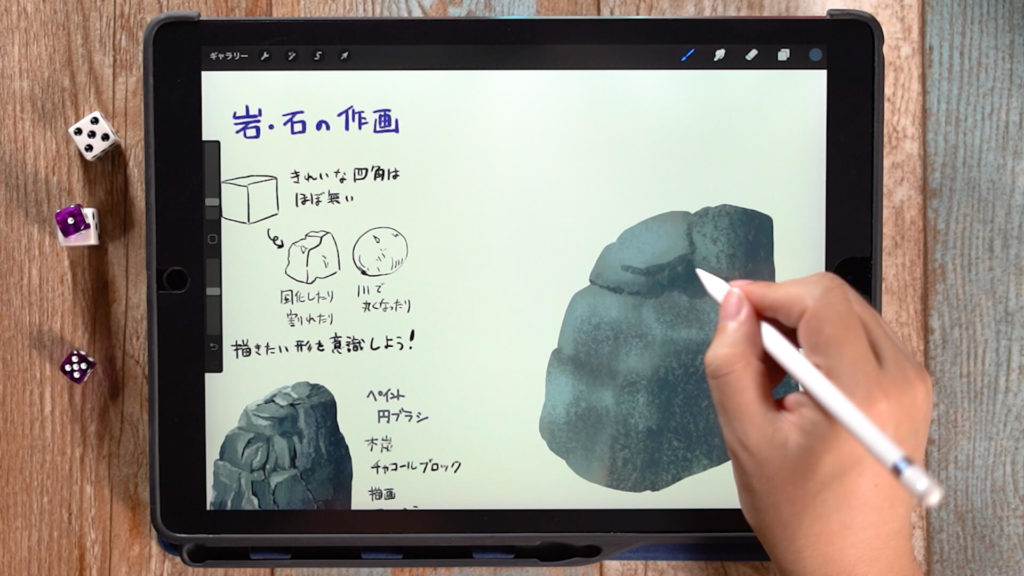
Further additions
Add shadows, highlights, etc., while keeping an eye on the overall balance.
Shaping
If there are parts of the shape that you do not like, you can change the shape by erasing the bottom layer with an eraser or mask. (Because the mask is clipped, areas drawn on other layers will also appear to disappear.)
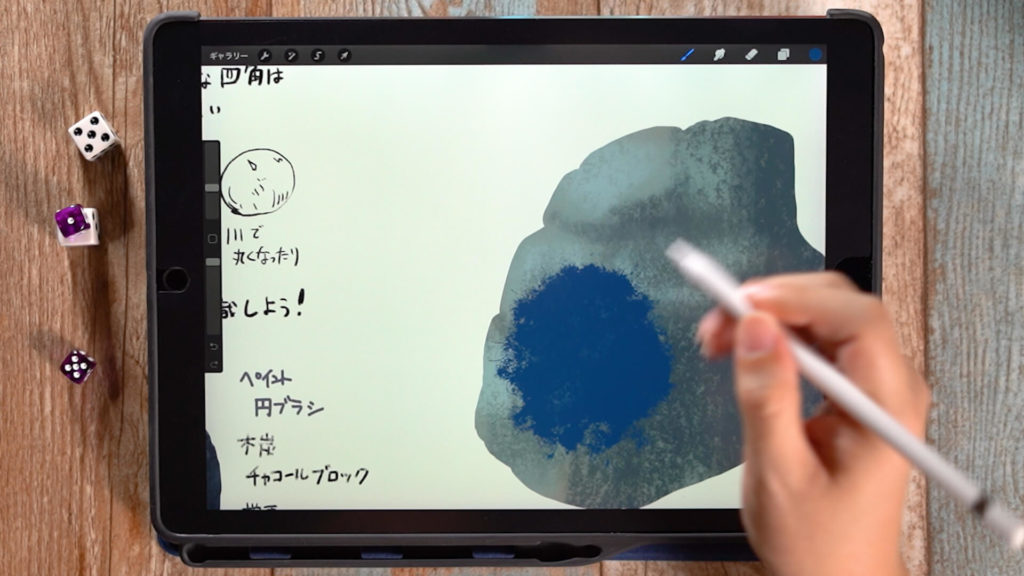
Adding Reflected Light
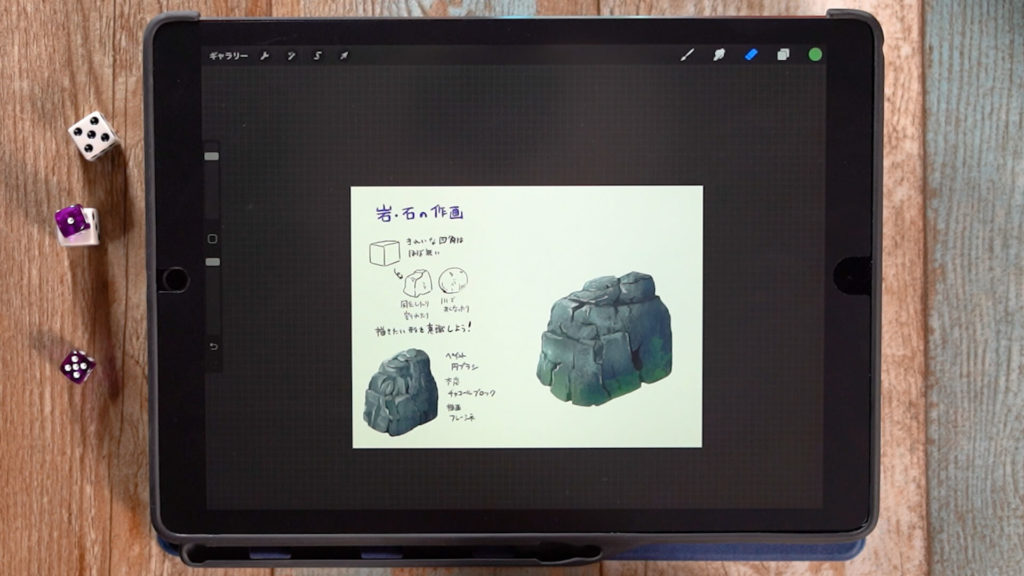
If the surrounding area has a certain color, you can add reflected light.
If this rock is in a grassy area, it will have a green reflective light. Paint the reflective light to match the surrounding background.
Detailed Explanatory Video
The video provides detailed explanations while making the drawing. If you want to check it out thoroughly, please click here.
[adchord]
Related Videos and Articles
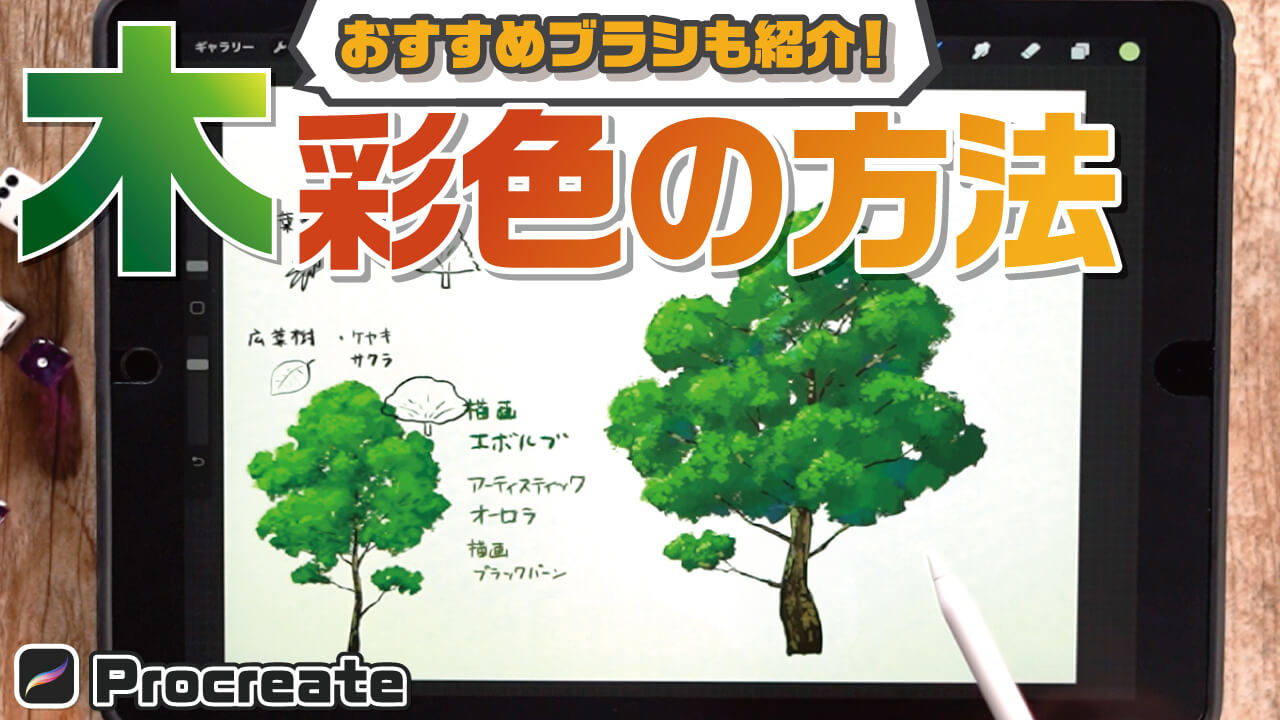
↓How to draw trees is also introduced.
↓Check the article
[How to draw a tree] Let’s color a tree using the default brushes!
Summary
This time, I introduced “How to color a rock” which is easy to draw.
Rocks, like trees, are often used to paint landscapes.
They are especially important in open spaces and mountain landscapes, where they can play a leading role, so please enjoy painting them.
If you can draw rocks, you can also draw pebbles and cliffs.
We hope you will try your hand at drawing rocks in a variety of shapes.
Thank you for watching until the end.
See you again in my next post!