I am Ari, a Concept Artists.
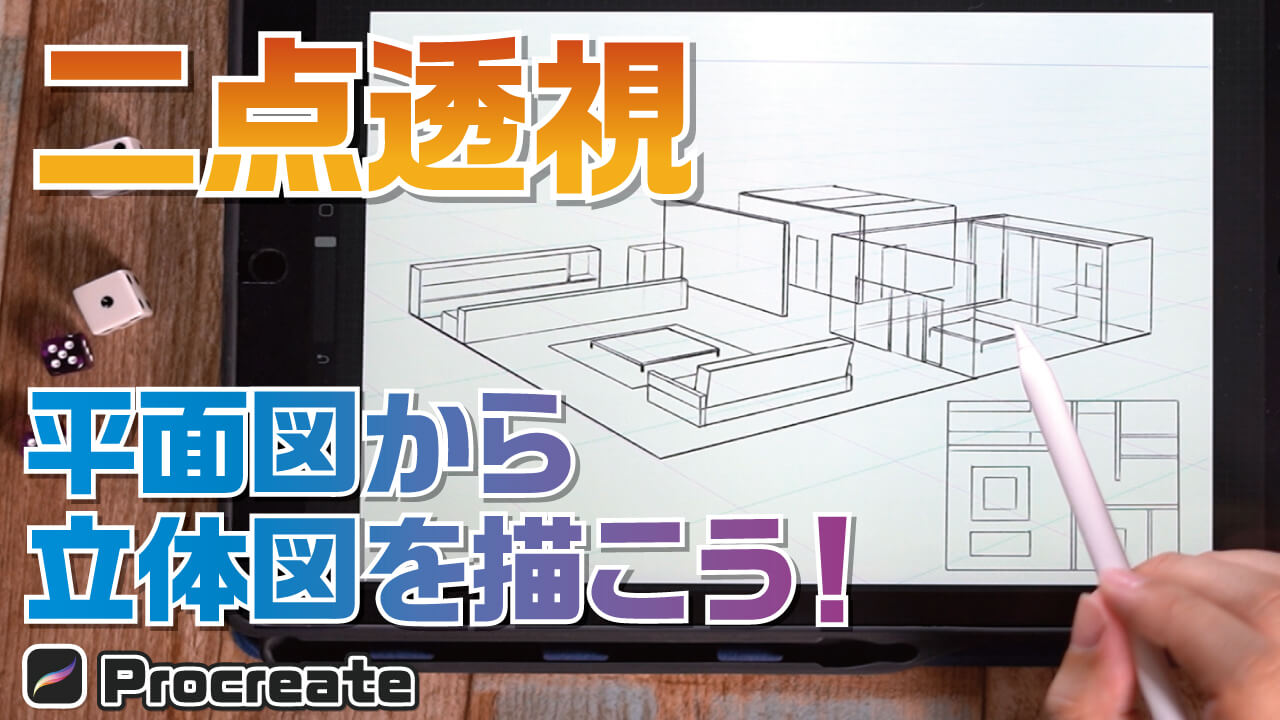
In this article, we will show you “How to Draw Room Interiors with a 2-Point Perspective”.
By learning this method, you will be able to draw room Environment Art. If you are having trouble balancing the size of furniture and people, or if you are not sure how to draw furniture, this article will be helpful.
If you want to learn more about the two-point perspective, please refer to this article.
→[basis]How to Draw an Environment Art Using 2-Point Perspective
The equipment and apps used in this article are iPad and Procreate; please try Adobe Photoshop, CLIP STUDIO PAINT, and other apps as well, as you can also draw by applying the concept.
If you are unsure which illustration app to use, please refer to this page. Here is a summary of recommended apps.
The video provides detailed explanations. If you want to check it out thoroughly, please click here.
[adchord]
Rooms are drawn with a two-point perspective
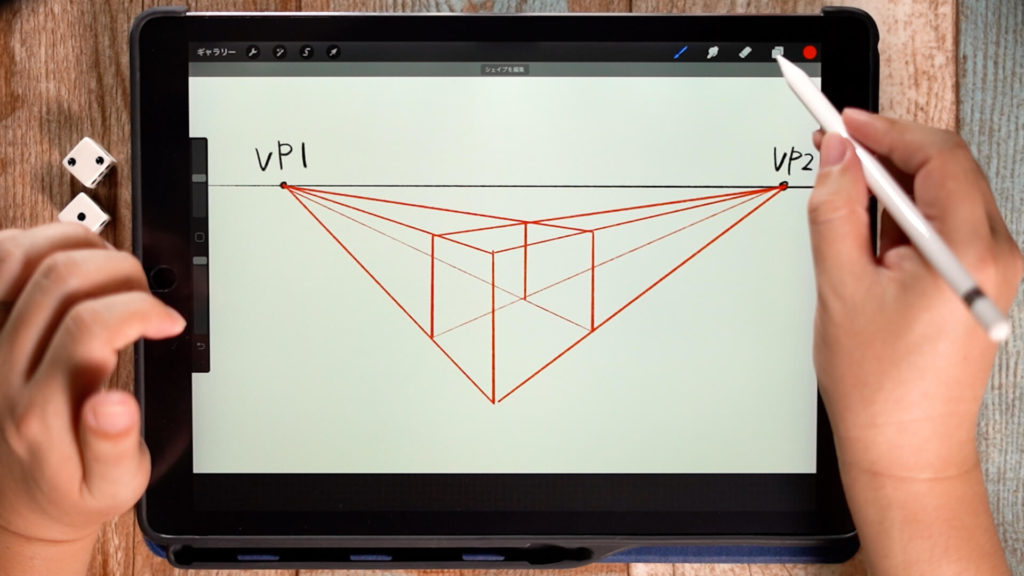
Two-point perspective is a perspective method in which two vanishing points are determined.
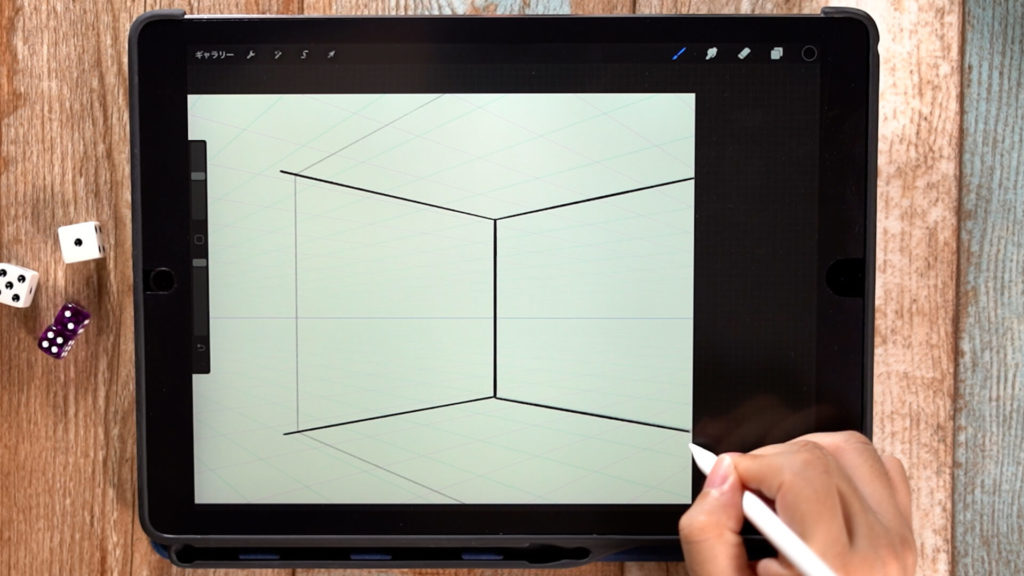
Drawing the back side of a wall
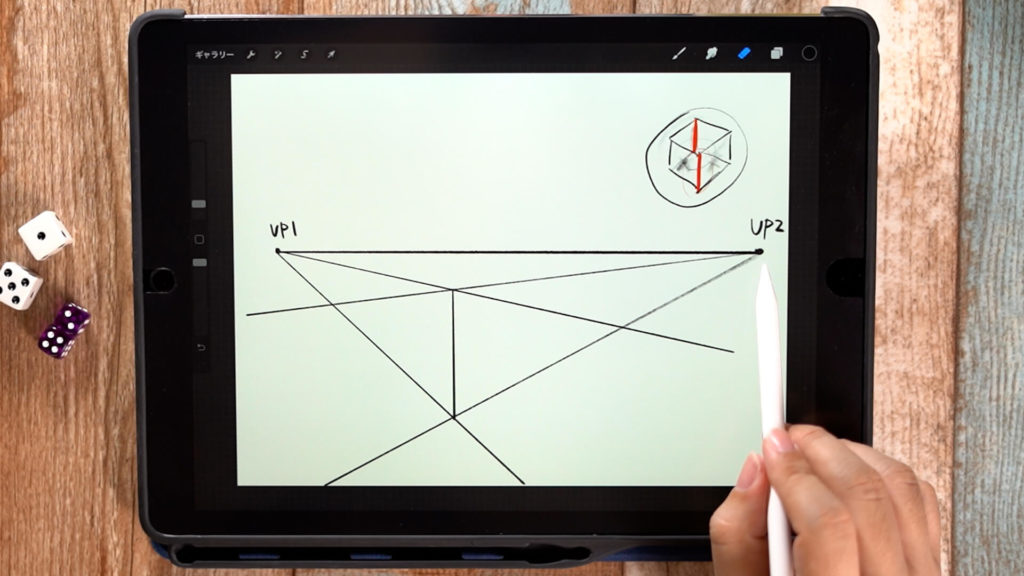
First, let us explain how to draw a room. Draw the back side of the wall in the room by drawing the eye level (EL) and the vanishing point (VP).
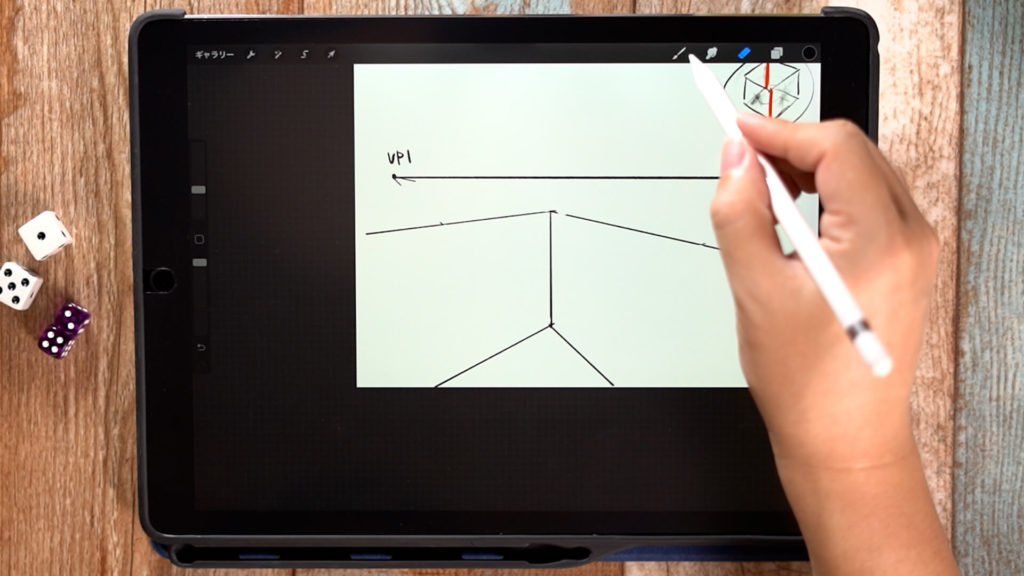
If you erase the lines that are not needed, it will look like this.
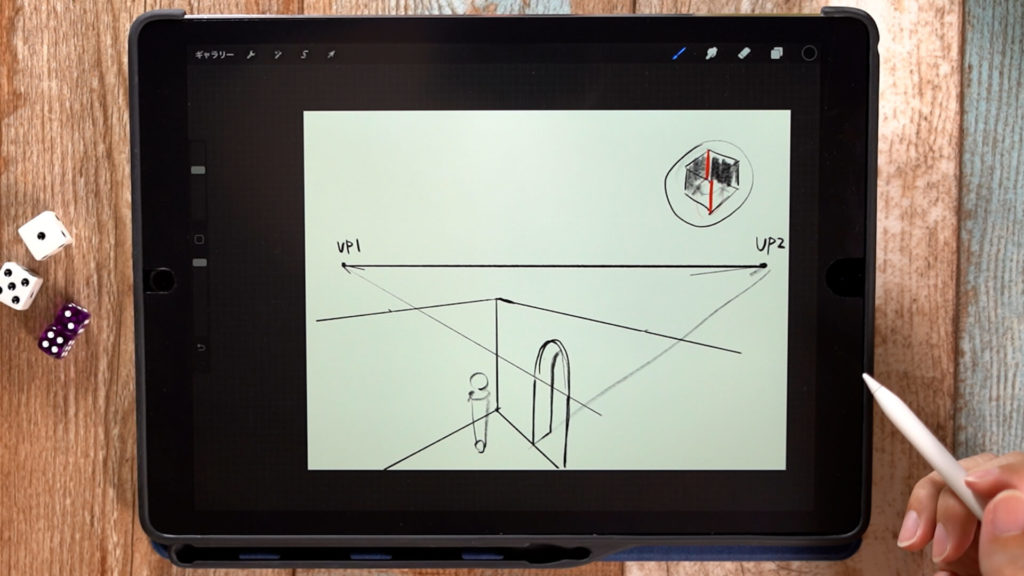
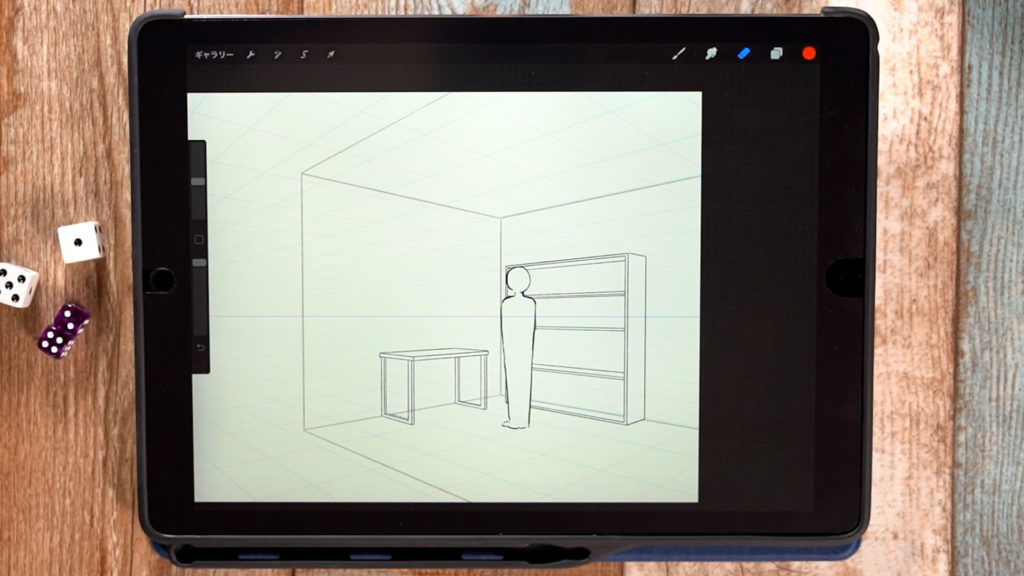
Place a person or draw a door to make it look more like a room.
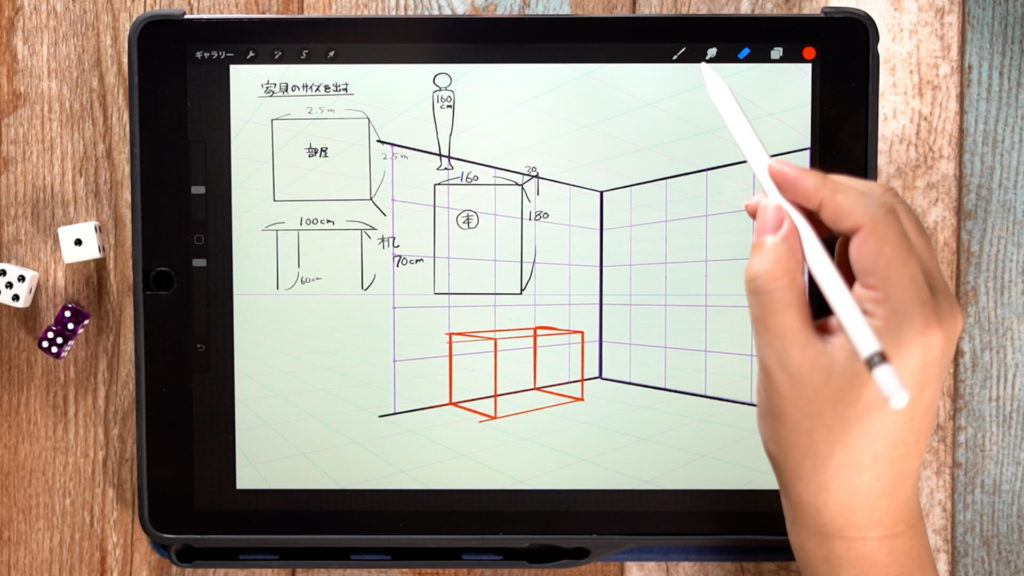
Bring out the size of the furniture.
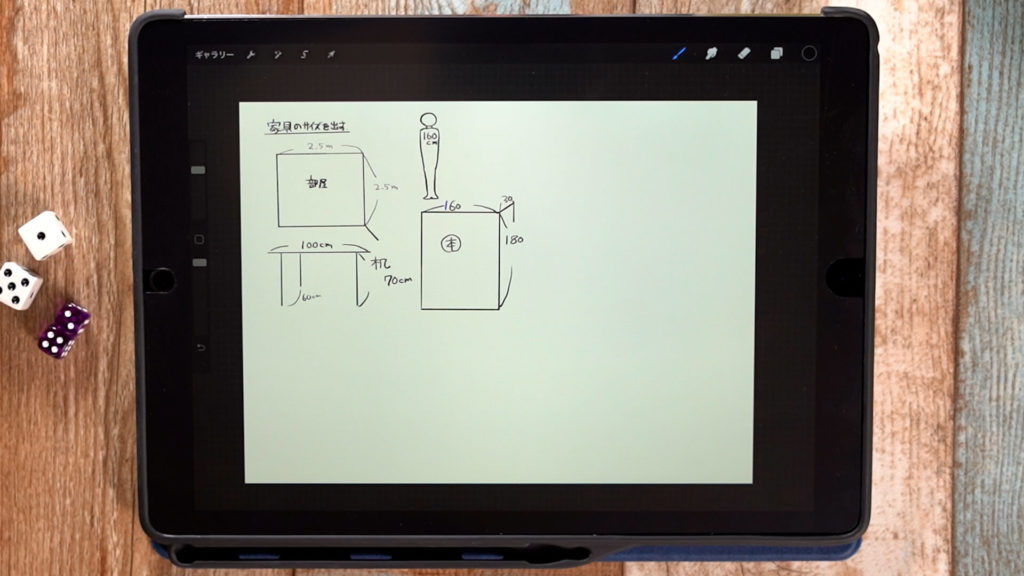
Let’s determine the specific size of each piece of furniture. This is the same size as the furniture used when drawing the room from a one-point perspective.
→[How to draw a room│One Point Perspective] How even a beginner can draw!
Prepare evenly spaced squares that will serve as memory.

Decide how many centimeters per memory you want this spacing to be, so you will have a reference for the size when drawing the furniture.
In this case, the size of the room is 250 cm, so we set 1 square to 50 cm.
Setting up the drawing guide
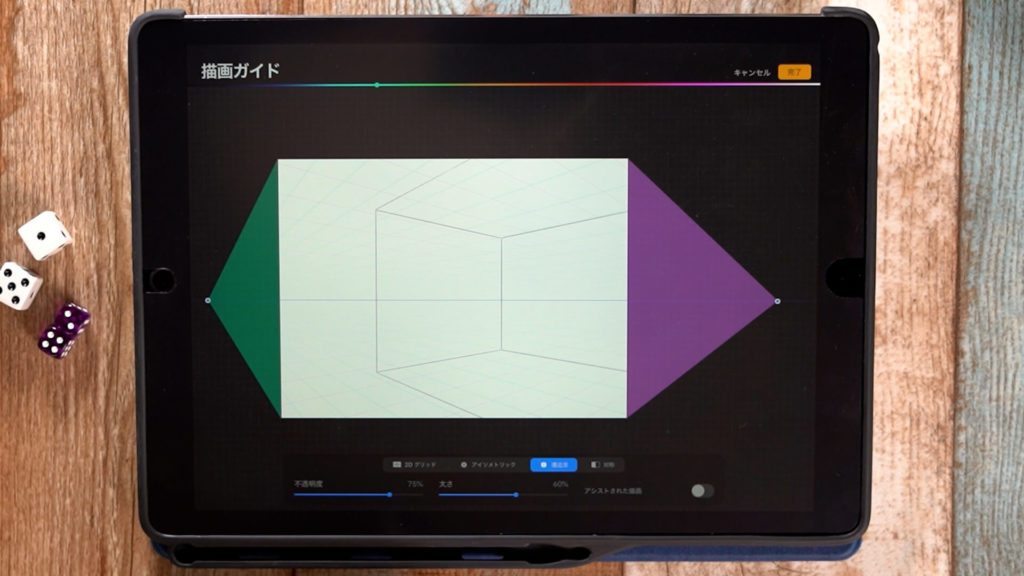
Now we will actually draw the interior of the room. Select “Action” > “Drawing Guide” > “Edit Drawing Guide” and set the drawing guide for 2-point perspective.
Drawing the walls
We will start from the back corner.
Place a grid on the wall
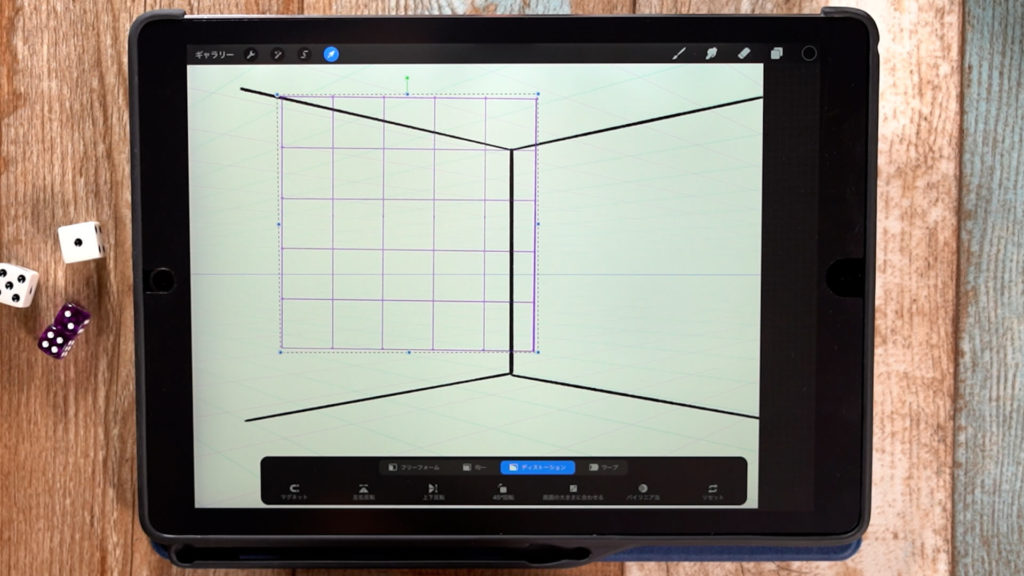
Place the grids you prepared earlier on each wall. You can transform them as in perspective by using Transform → Distortion.
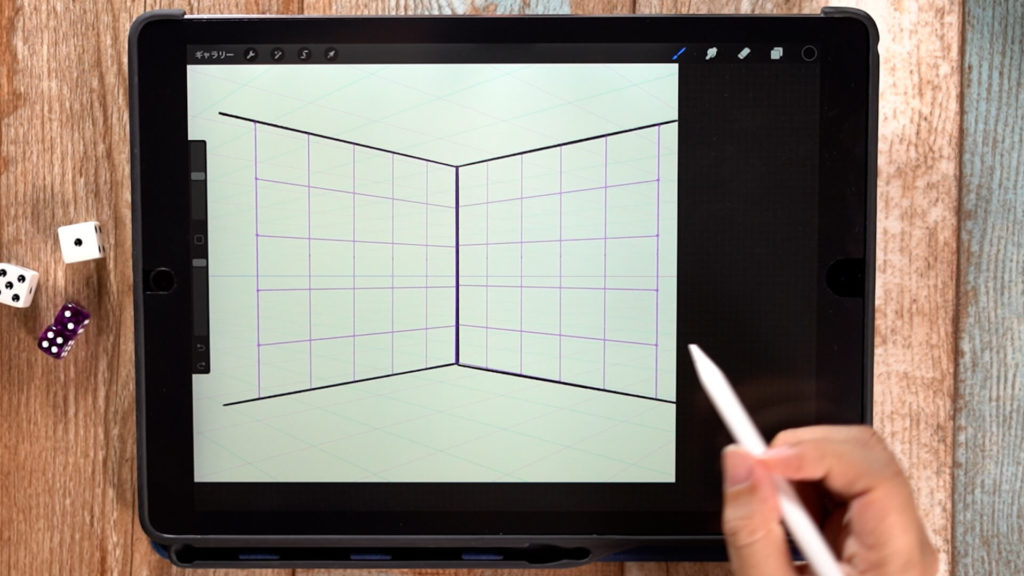
When both are placed, it will look like this. We now have a 250cm x 250cm room ready to go.
Drawing the desk
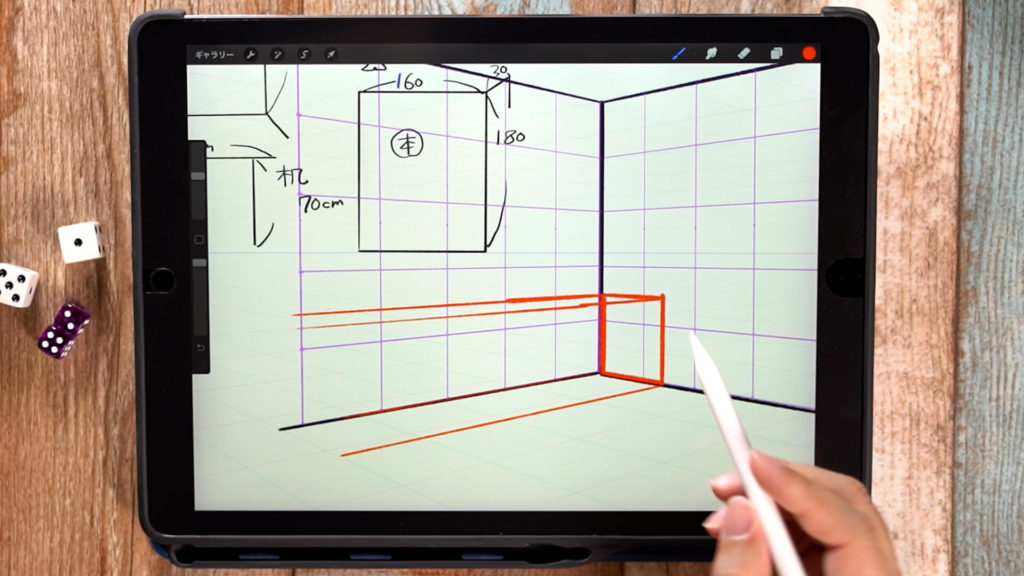
First, draw a box the size of the furniture you want to draw. Drawing the box as if stretching it from end to end makes it easier to see the size.
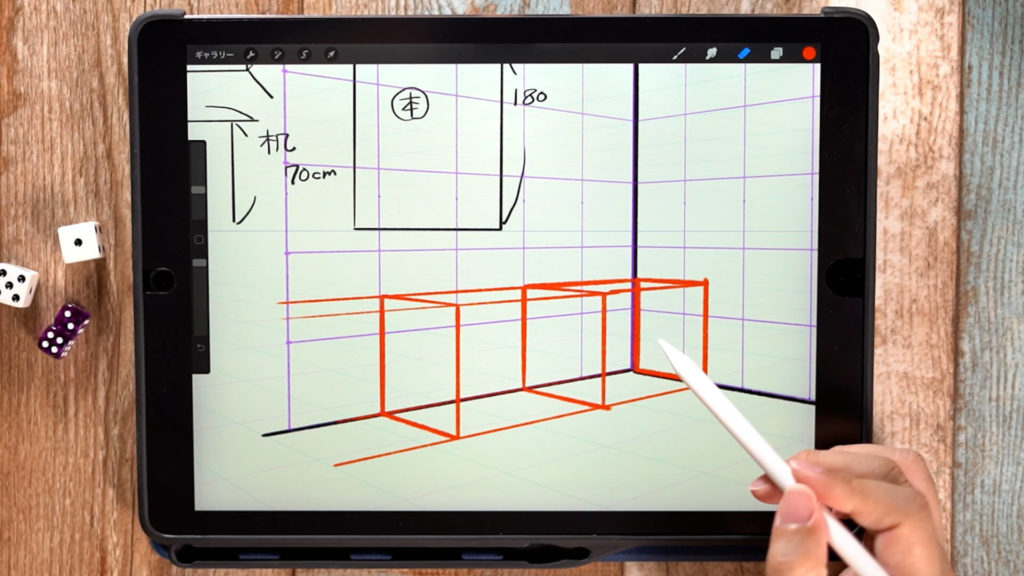
Draw the box while referring to the grid and the setting material.
After erasing the unnecessary parts, the box will look like this.
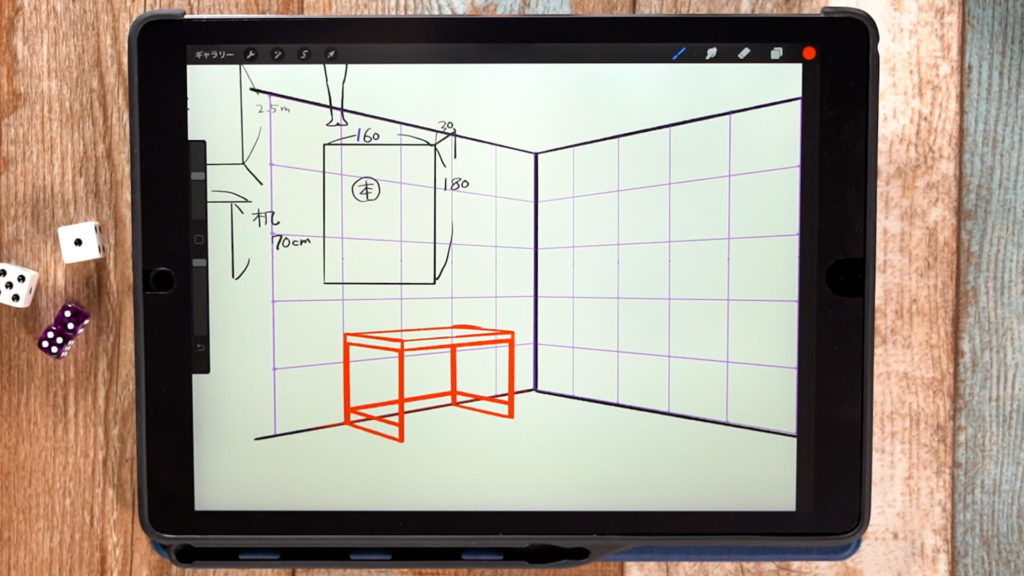
After drawing each part and deleting unnecessary parts, the desk is complete.
Drawing the bookshelf
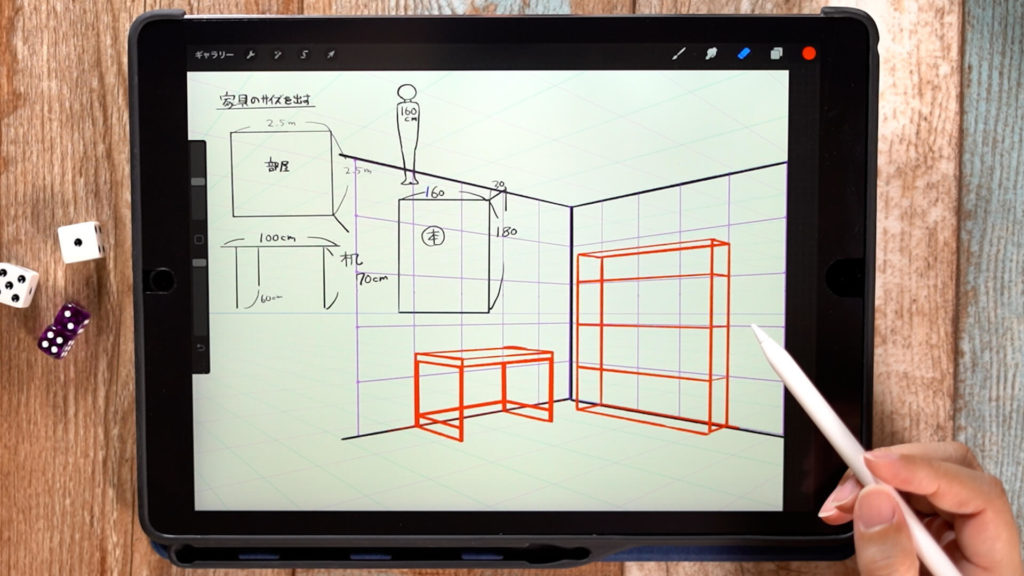
The same method was used to draw the bookshelf.
The room interior is complete!
The desk and bookshelf will look like this when neatly cleaned up. You can draw the interior by arranging the other furniture in the same way.
Detailed Explanatory Video
The video provides detailed explanations while drawing. If you want to check it out thoroughly, please click here.
Related Videos
There is also a video that introduces the interior of a room drawn from a 2-point perspective in a making-of style. You can see what it looks like from the rough production, and we hope you will find it useful as a reference for your illustration work.
Conclusion
In this article, we have introduced “How to draw a room interior in two-point perspective.
It is easy to draw by using the drawing guide and grid. I hope you will all try drawing various Environment Art while using them as a reference!
Thank you for watching until the end.
See you again in my next post!
.jpg)