

I am Ari, a Concept Artists.
In this article, we will introduce “How to Move Objects to Fit Perspective.
By learning this method, you can utilize it when placing objects such as people and cars in the background.
The equipment and apps used in this article are iPad and Procreate; please try Adobe Photoshop, CLIP STUDIO PAINT, and other apps as well, as you can also draw by applying the concept.
If you are unsure which illustration app to use, please refer to this page. Here is a summary of recommended apps.
The video provides detailed explanations. If you want to check it out thoroughly, please click here.
[adchord]
Purpose of this article
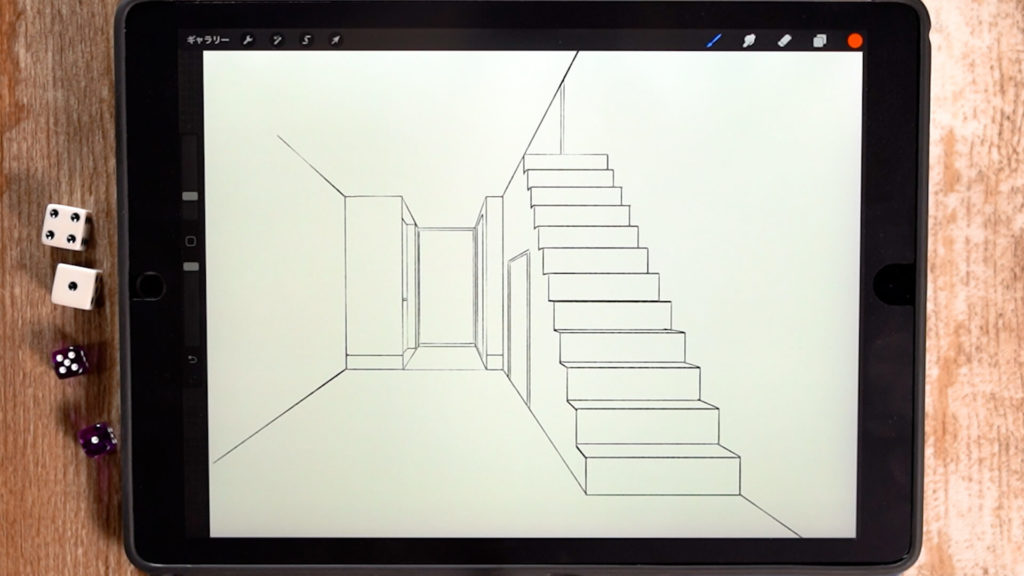
The Environment Art to be used this time will be the background previously drawn in [1-point perspective application]Let’s draw a staircase!
This tutorial introduces how to place square objects on the background and make them move while maintaining perspective.
This is one of the most frequently used methods among the applications, as it allows you to move figures and furniture naturally.
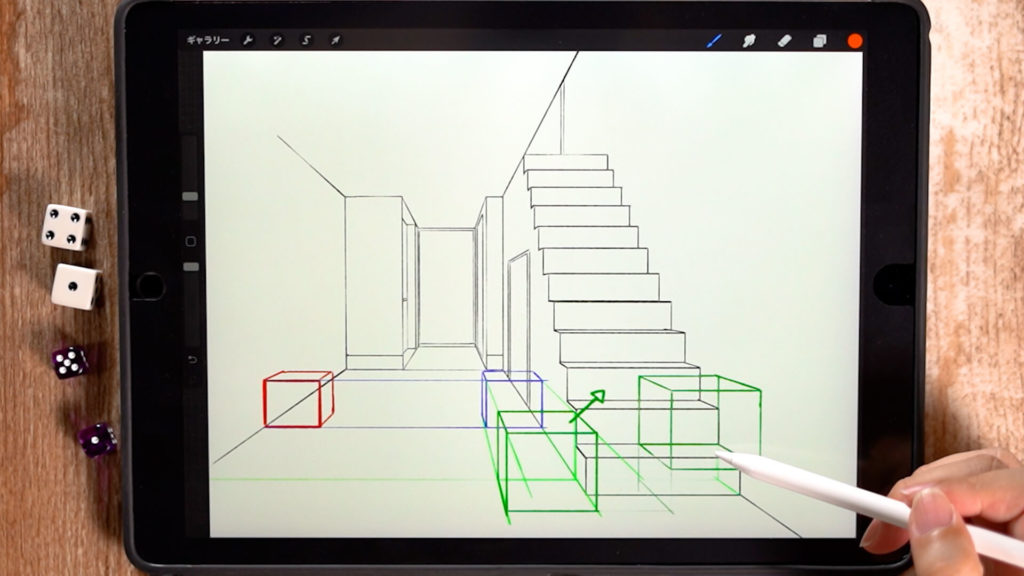
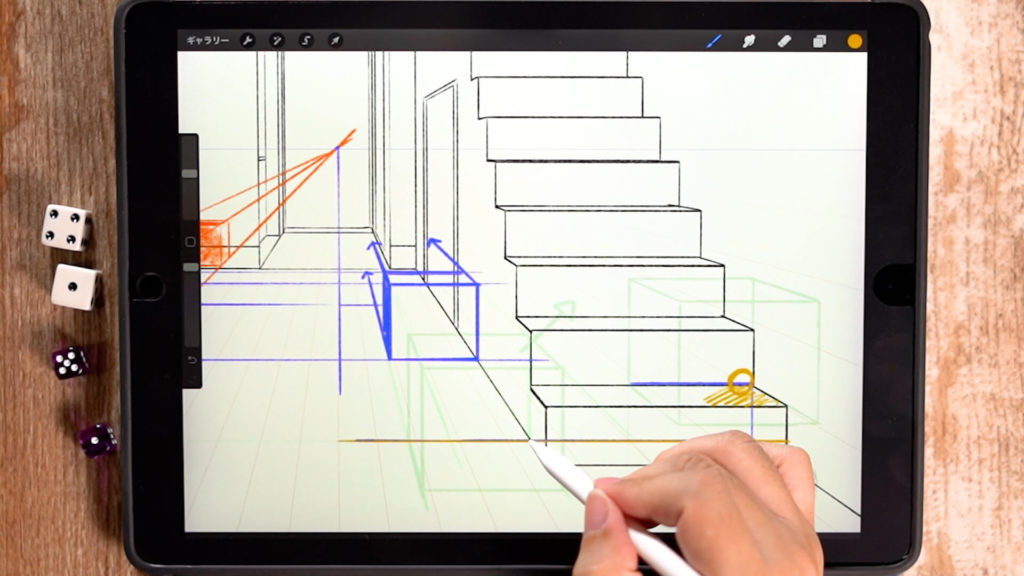
In this case, we will move the red rectangular box to the top of the stairs on the right.
How to move objects
Draw the first object

We will draw the first reference box by setting the 1-point perspective drawing guide in “Action” -> “Drawing Guide” ON -> “Edit Drawing Guide”.
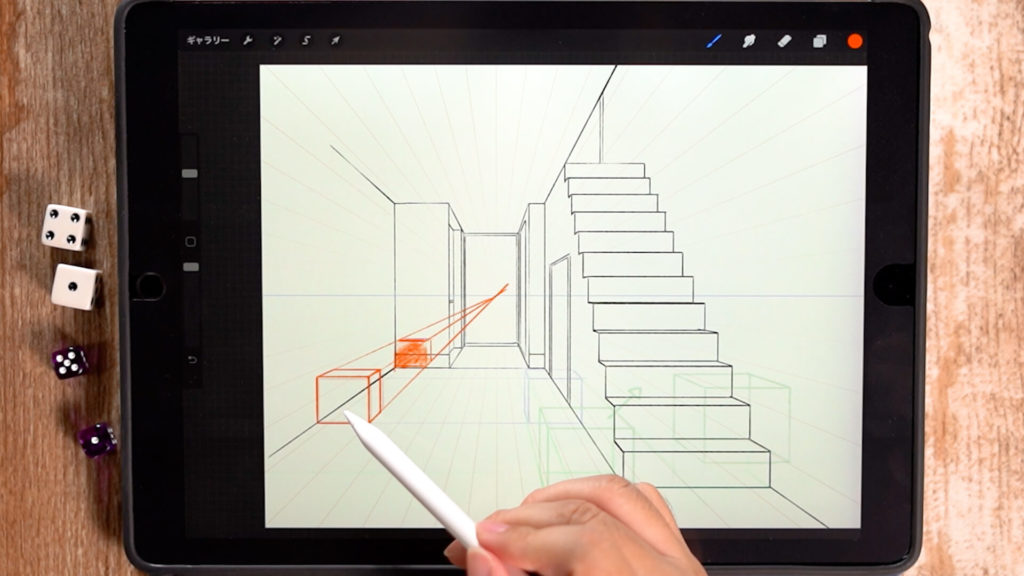
If you want to move the box in the middle of the vanishing point using one-point perspective, simply draw an auxiliary line like this to move the box.
Moving horizontally
To move a box horizontally, draw an auxiliary line directly across and toward the vanishing point to move a box of the same size horizontally.
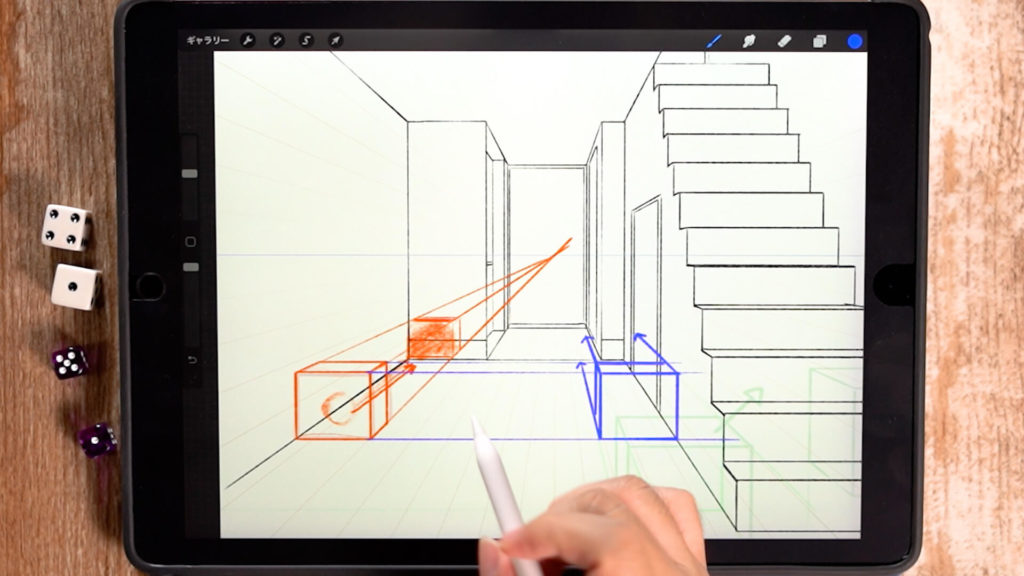
Moving to the front
Move the box to the same position as the horizontal position of the staircase you want to bring to the final destination.
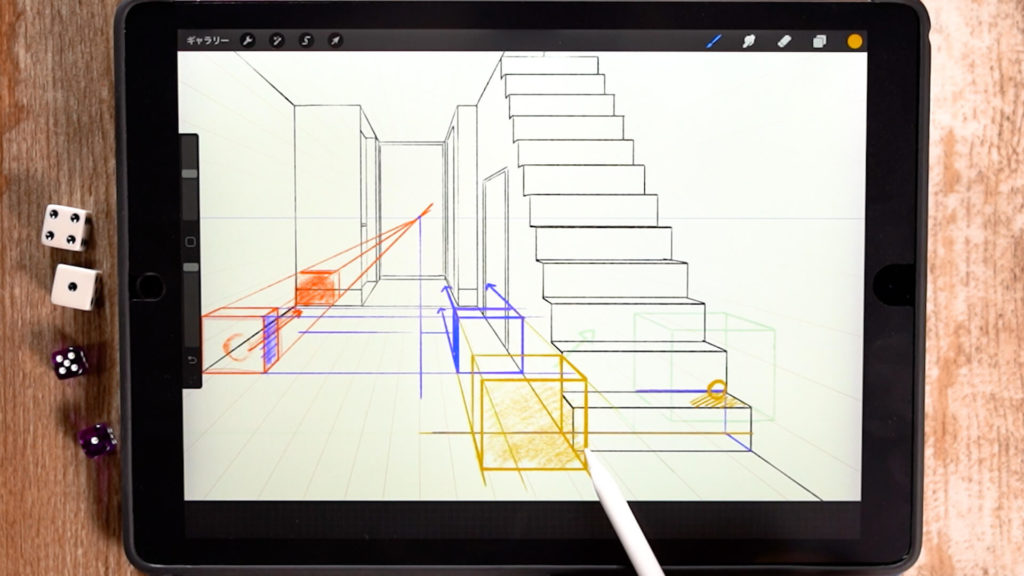
Extend the auxiliary line of the blue box and draw the box. The box can now be moved to the front.
To move the box up
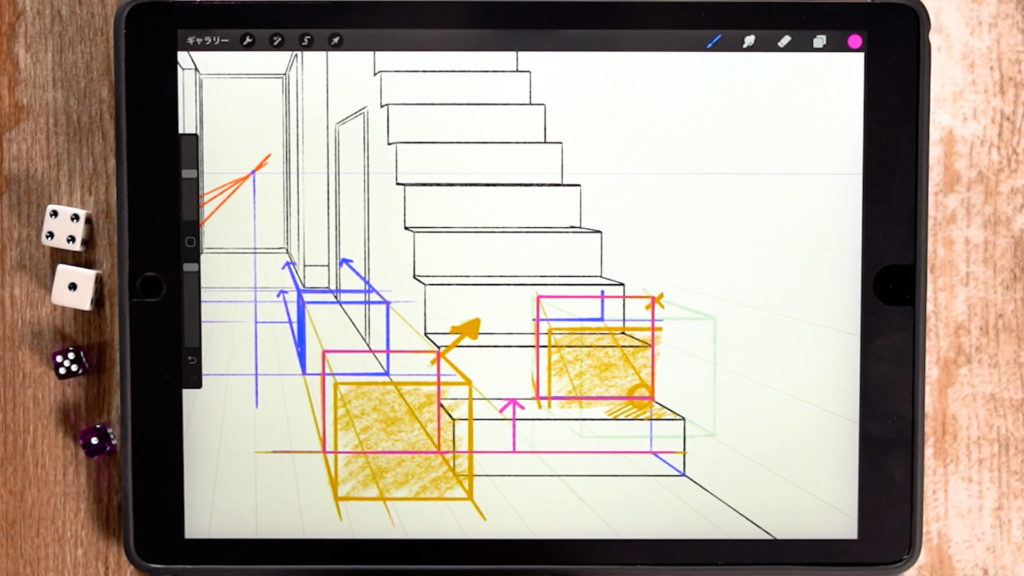
Move the box to the top of the staircase.
The rectangle drawn in pink is the same location and size as the box just up in the air, so you can copy and paste that rectangle to draw it easily.
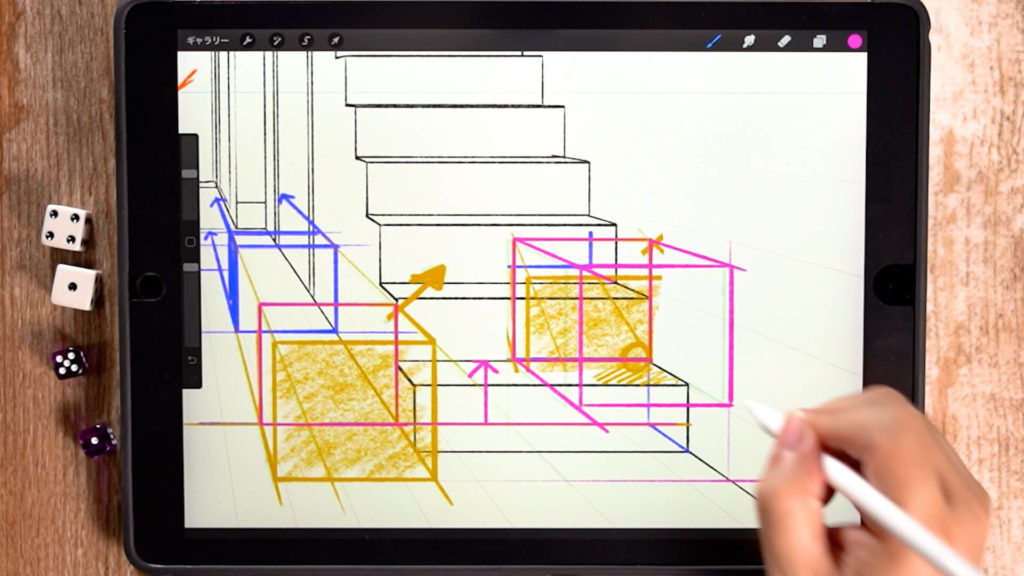
You could draw a box of the same size on top of the stairs.
We could move the boxes!
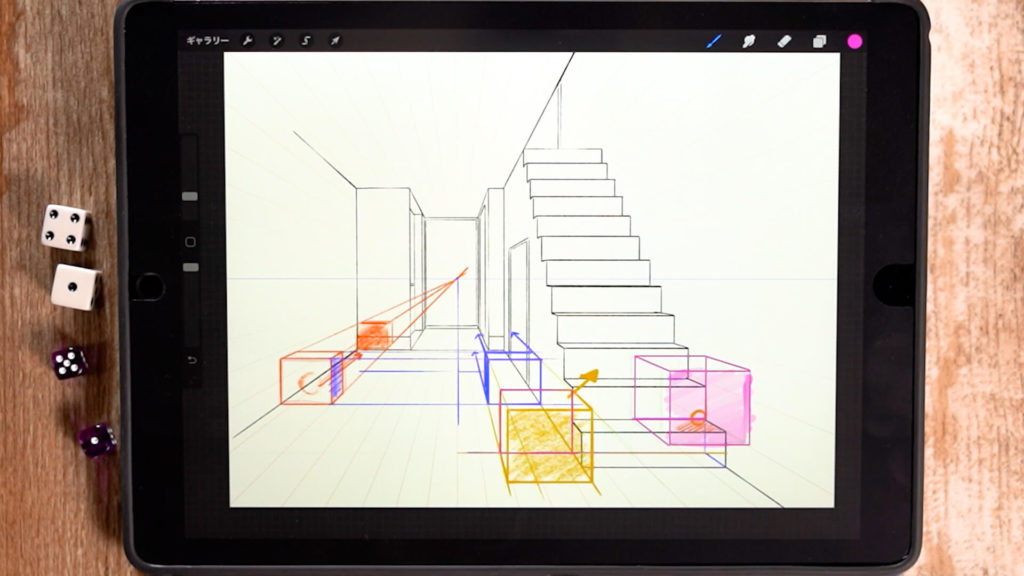
We were able to move the boxes by drawing the perspective of each one and moving it.
What we could do with application.
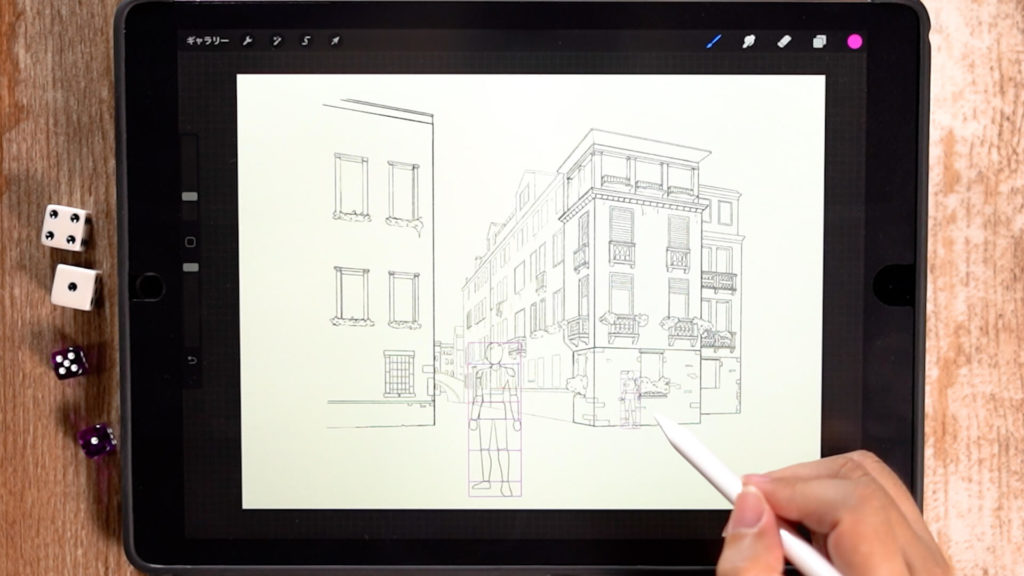
We have placed a person in a box.
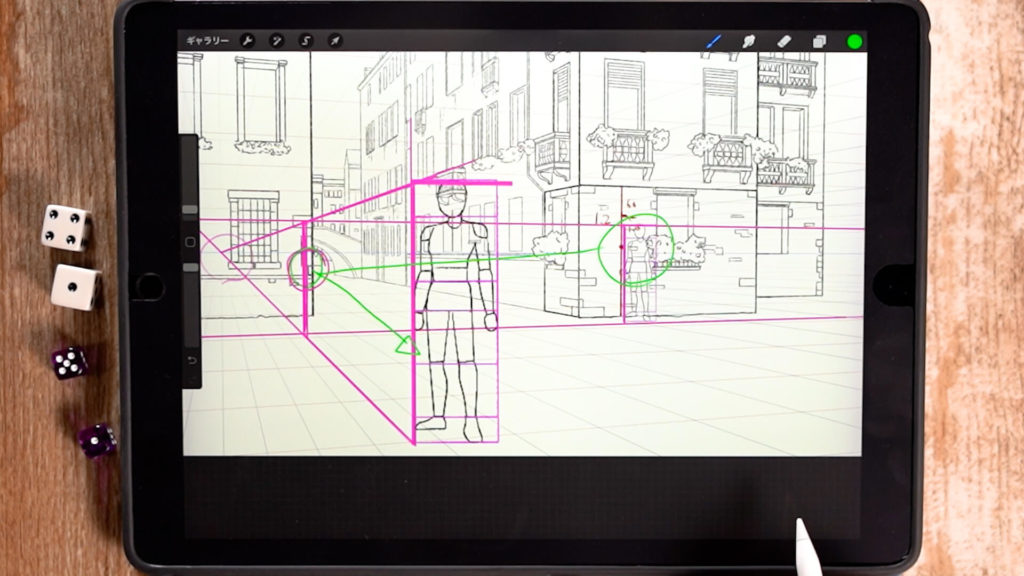
By moving that box, you can move a person of the same size freely within the same background.
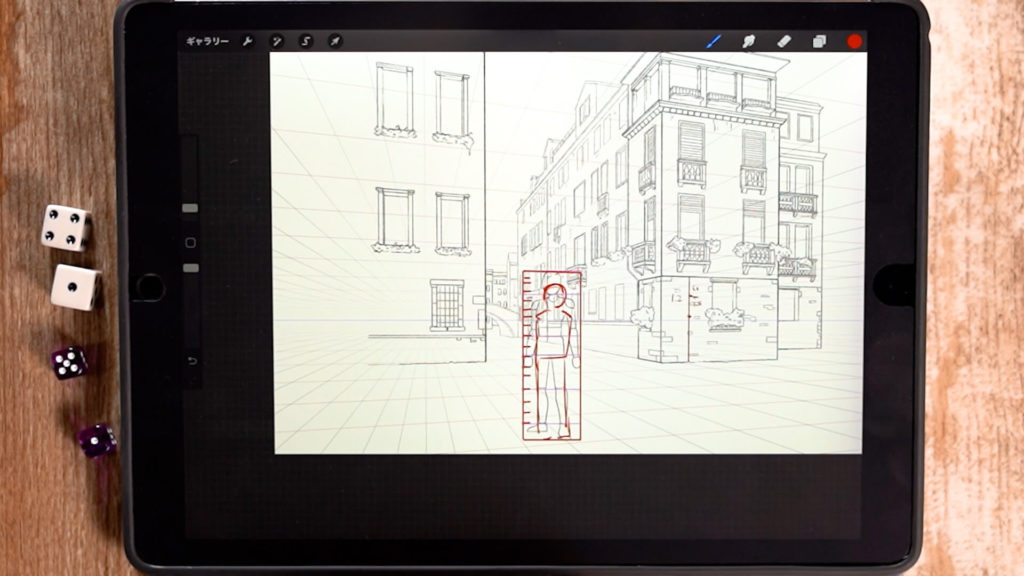
By creating a ruler, people of different heights and objects of various sizes can also be placed freely, so please try to apply and utilize this function.
Detailed Explanatory Video
The video provides detailed explanations while drawing. If you want to check it out thoroughly, please click here.
Conclusion
In this article, we introduced “How to move an object in accordance with the perspective.
Although it is a bit tedious work, it is possible to move objects and people in a beautiful size, so please try it out.
Thank you for watching until the end.
See you again in my next post!
