I am Ari, a Concept Artists.
This time, I will explain about “2-point perspective” and “3-point perspective”.
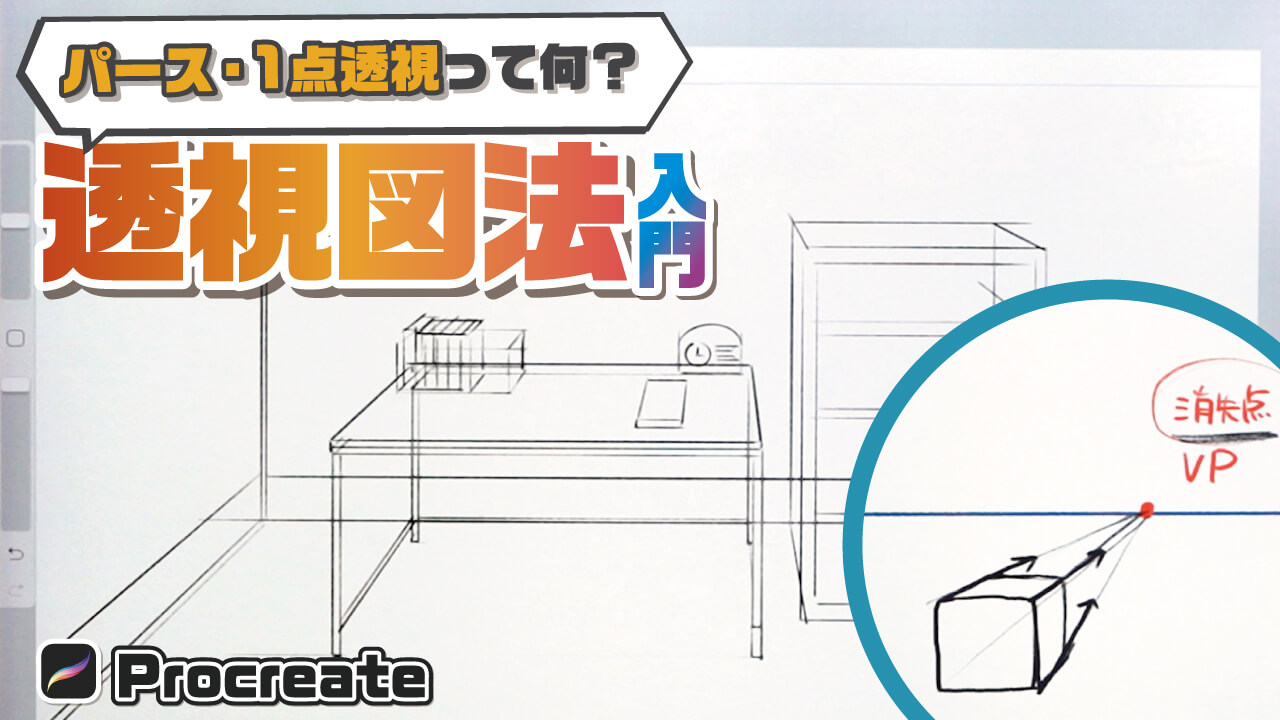
In the previous article, I briefly explained “What are perspective and one-point perspective” and “One-point perspective”, so if you haven’t seen them yet, please click here to see them.
→What are perspective and one-point perspective? Environment Art Rudiments
The equipment and apps used in this article are iPad and Procreate; please try Adobe Photoshop, CLIP STUDIO PAINT, and other apps as well, as you can also draw by applying the concept.
If you are not sure which illustration app to use, please refer to this page. Here is a summary of recommended apps.
The video explains it in detail. If you want to check it out, please click here.
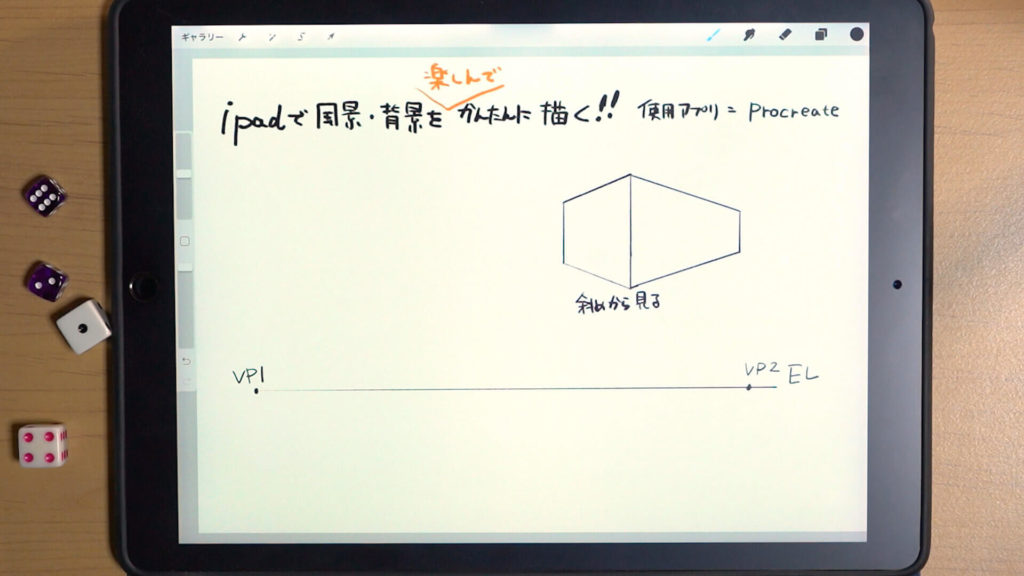
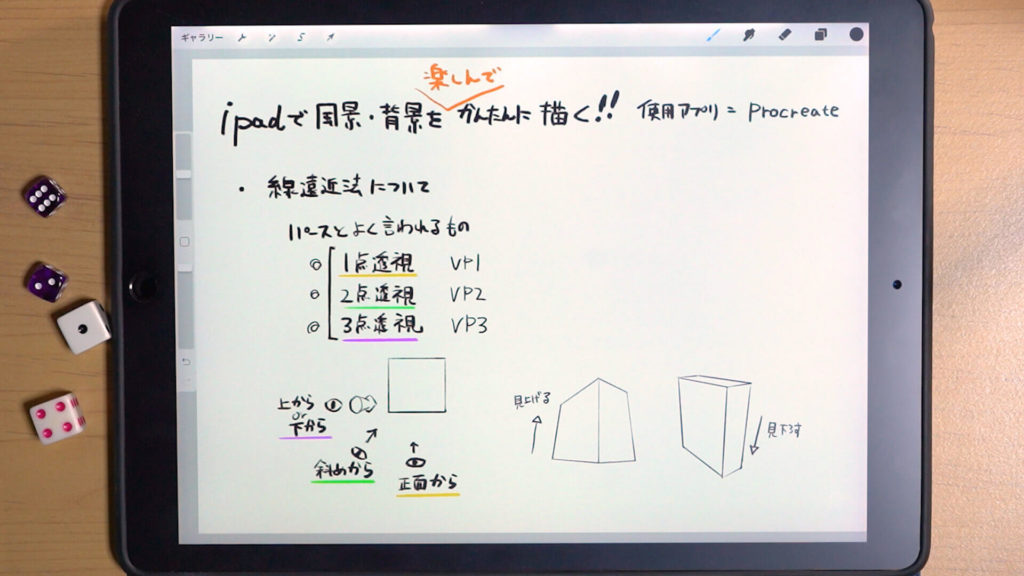
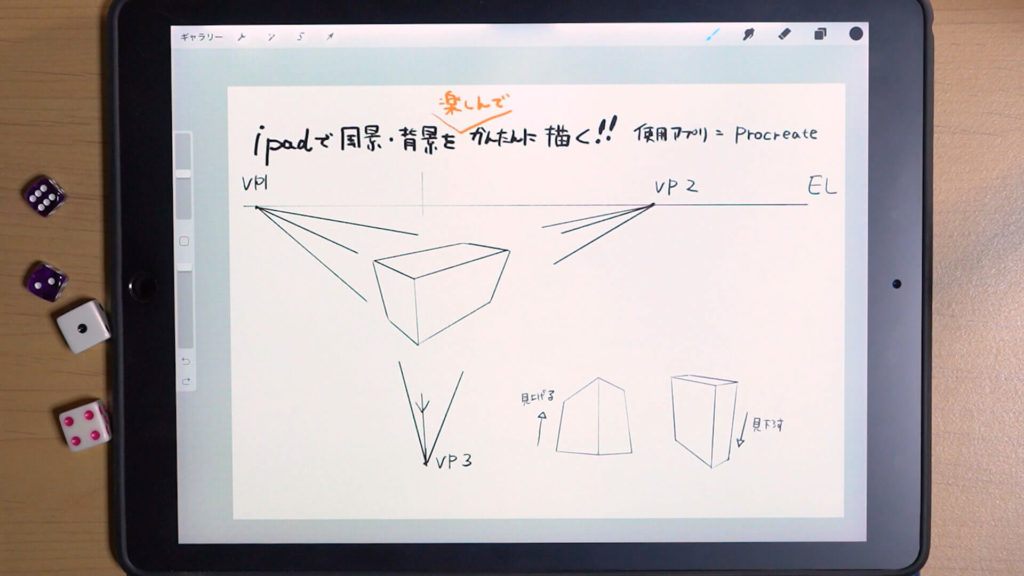
The Basics of “Two Point Perspective”
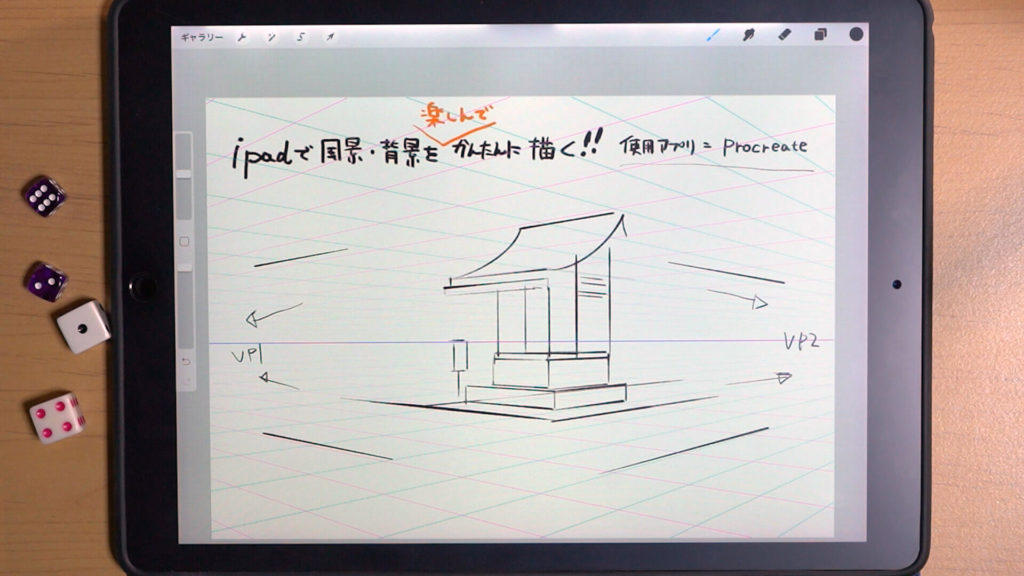
Two-point perspective is a view from an oblique angle. It is called “2-Point Perspective” because there are two points of convergence (vanishing point: VP).
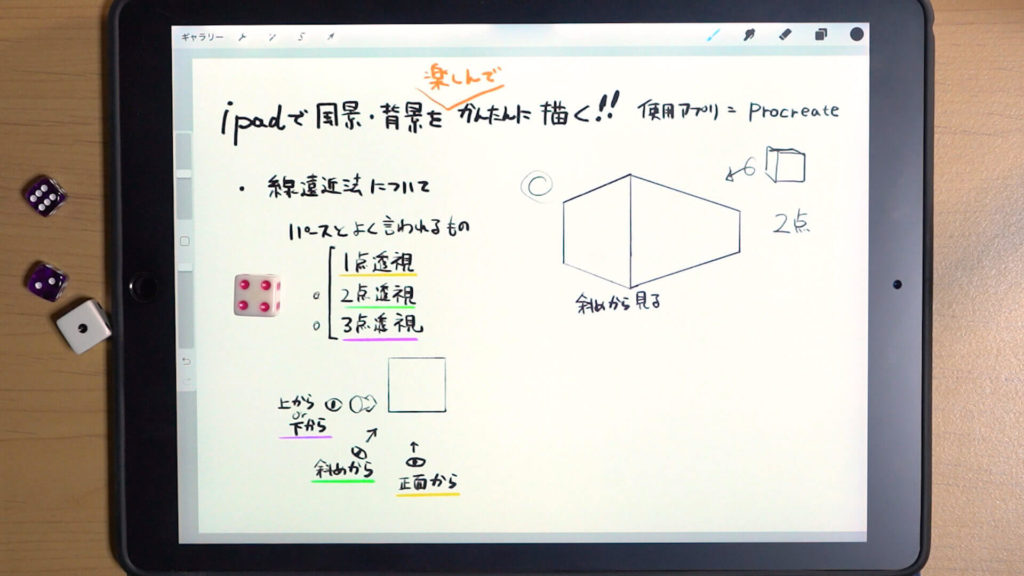
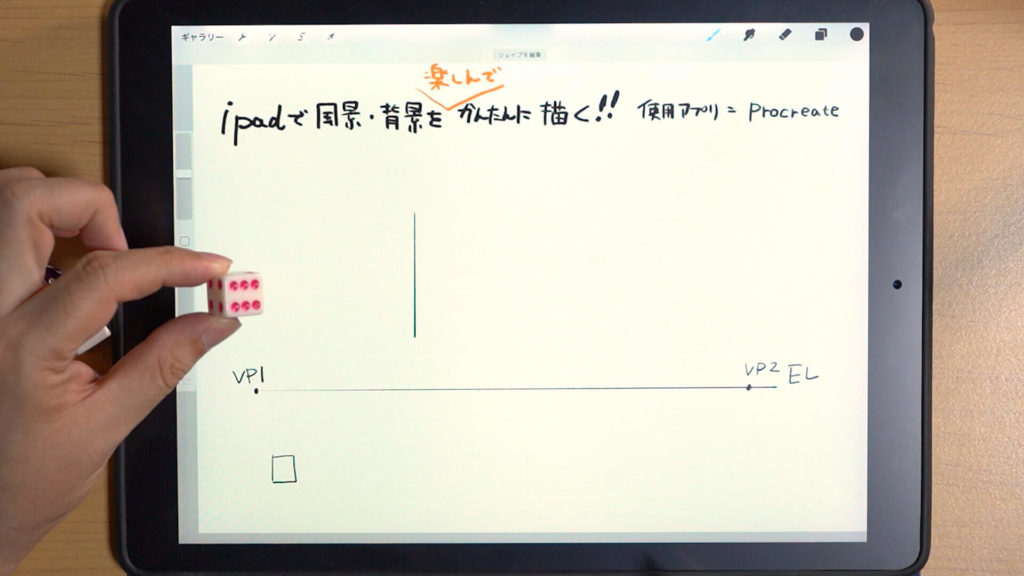
How to draw “Two Point Perspective”
(1)Draw two points EL (eye level) and VP (vanishing point).
(2) Draw a corner.
(3)Draw a line connecting VP1 and VP2.
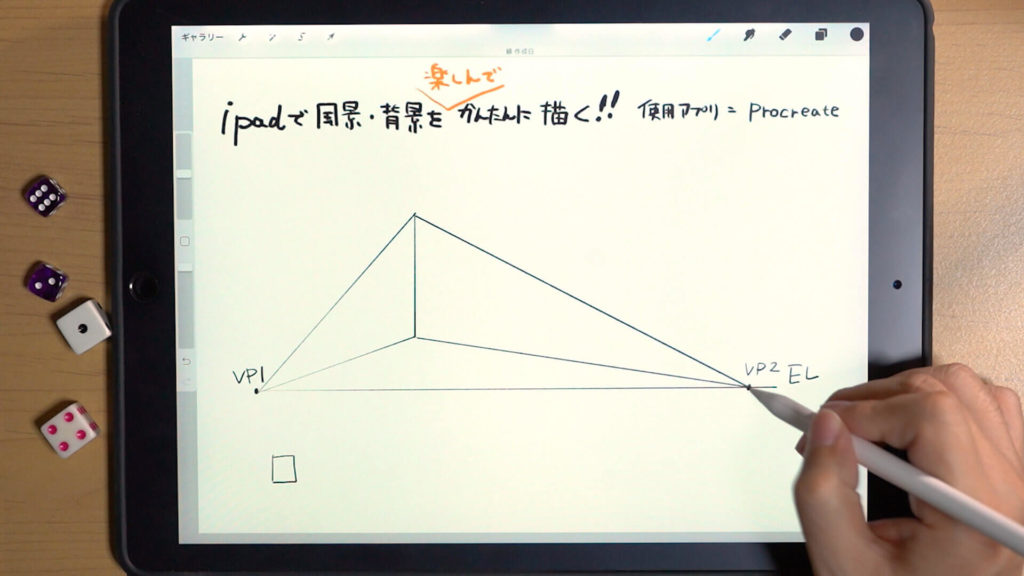
(4) Decide the width of the line and draw it vertically.
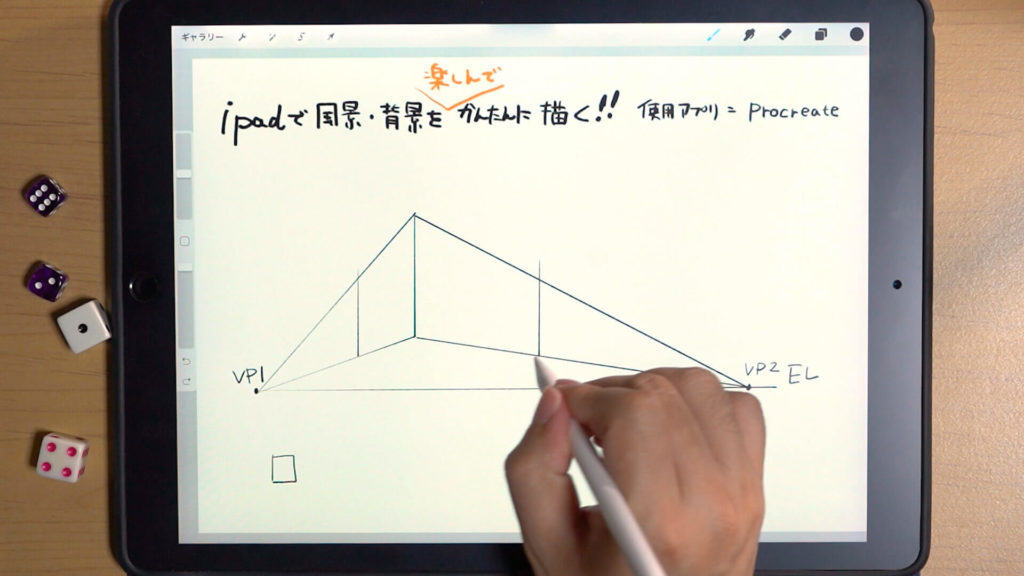
(5)Connect from the determined width to VP1 and VP2.
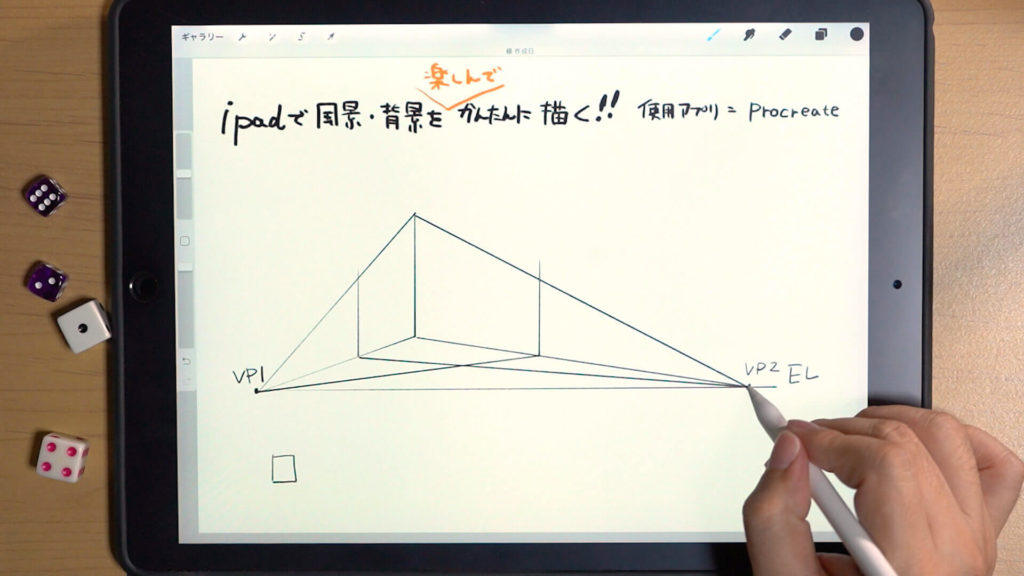
(6)Finish by erasing unnecessary lines!
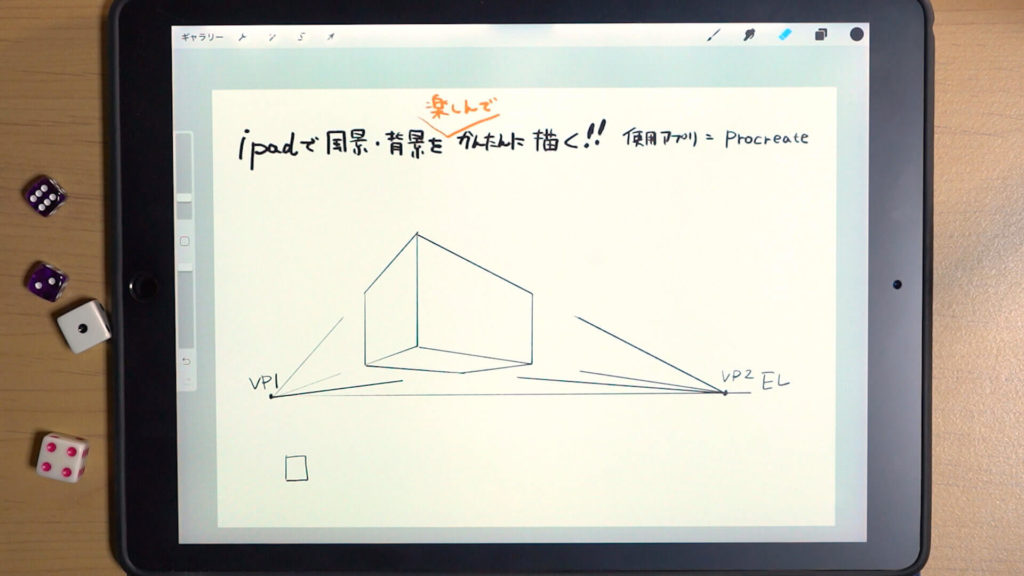
If the upper corner looks sharp, set VP farther away.
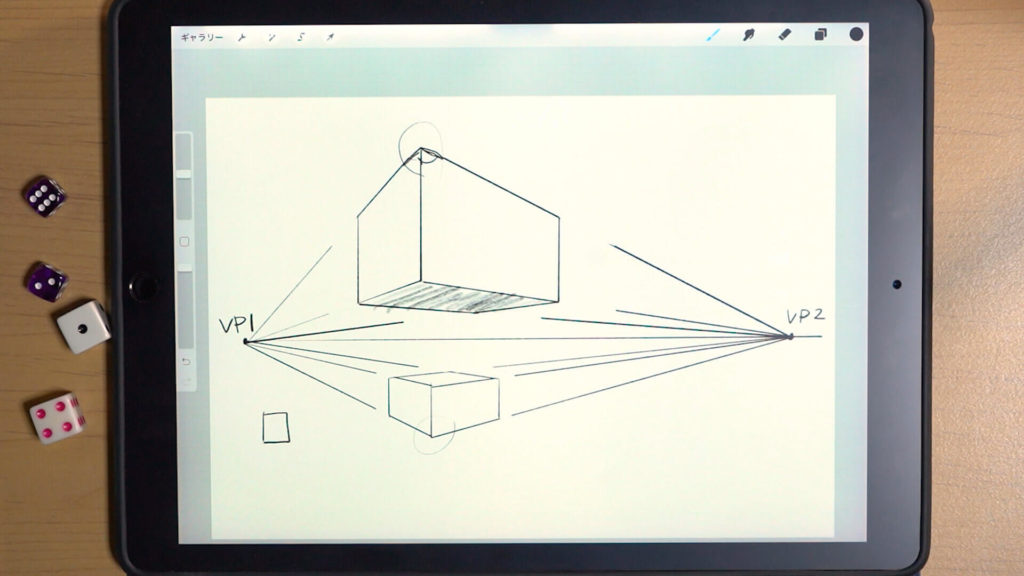
Illustrations that can be drawn using “2-Point Perspective”
By using “2-Point Perspective”, you can draw an illustration like this.
When the VP is displayed, it looks like this.
If you can draw with two-point perspective, you will be able to draw all kinds of backgrounds from outdoors to indoors, so please try to master it!
You can easily draw perspective using the drawing guide in “Procreate” and the perspective ruler tool in “CLIP STUDIO PAINT,” so give it a try.
For more information on useful functions such as the drawing guide, please click here.
[adchord]
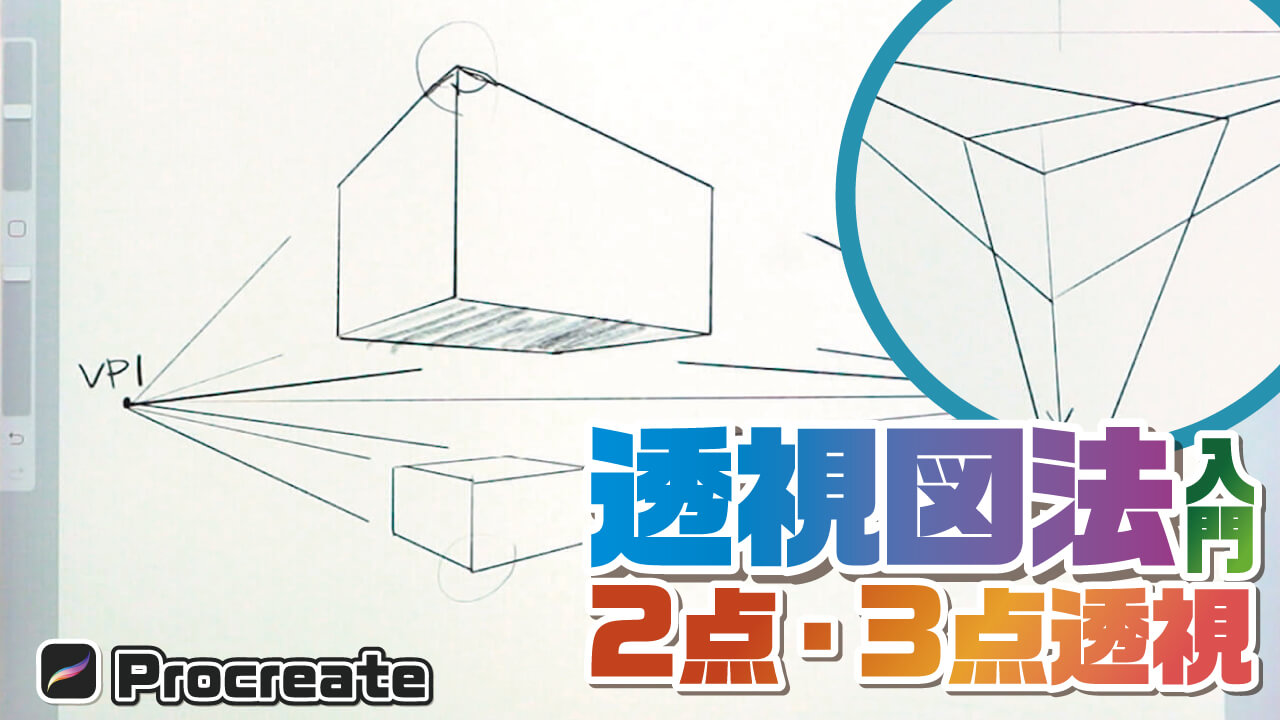
Basics of “3-Point Perspective”
In “3-Point Perspective”, there are three points of convergence (vanishing point: VP).
When looking up, a VP is added at the top, and when looking down, a VP is added at the bottom.
How to draw “3-Point Perspective”
(1) Draw VP3 at the end of the line drawn perpendicular to the two points EL (eye level) and VP (vanishing point).

(2) Draw a vertical line connecting to VP3, and connect VP1 and VP2 from that line.
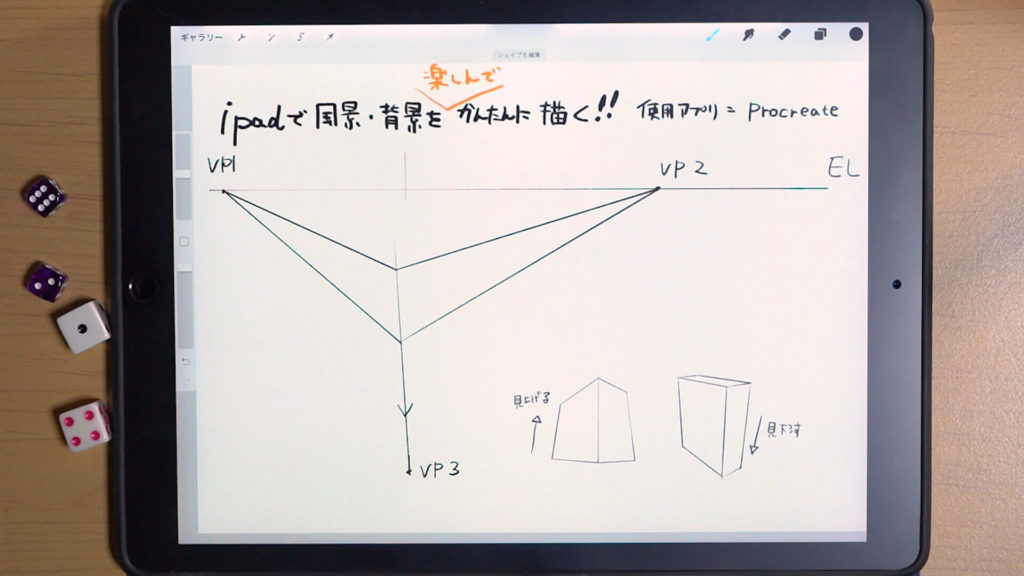
(3) Converge the vertical lines to VP3.

(4) Connect VP1 and VP2 from each vertical line.
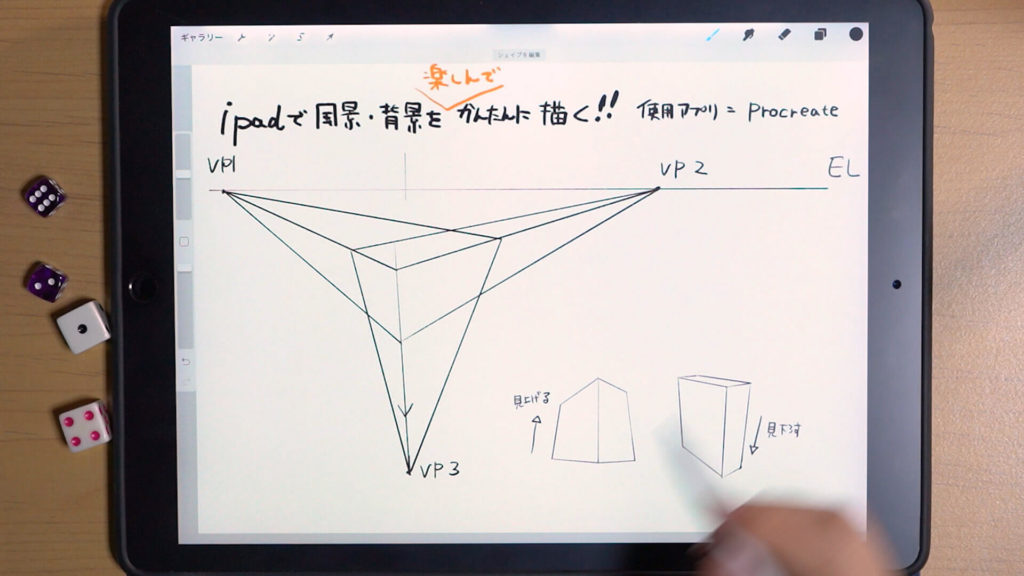
(5) Eliminate unnecessary lines, and you are done!
This perspective method is difficult to draw if you are not familiar with it because there are almost no straight lines, but once you learn it, you can use it for a variety of expressions.
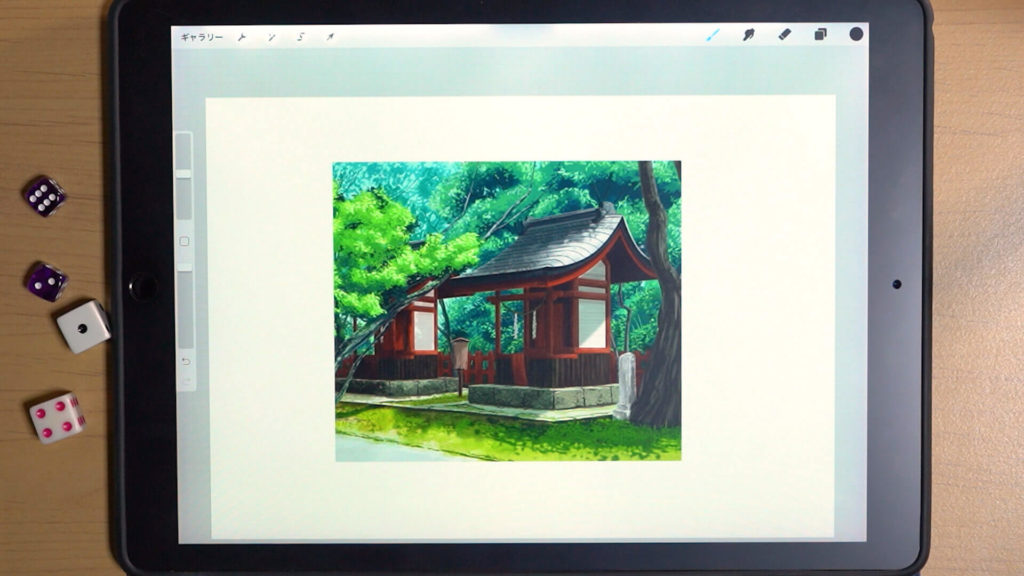
Illustrations that can be drawn using “2-point perspective”
By using “3-point perspective”, you can draw this kind of illustration.
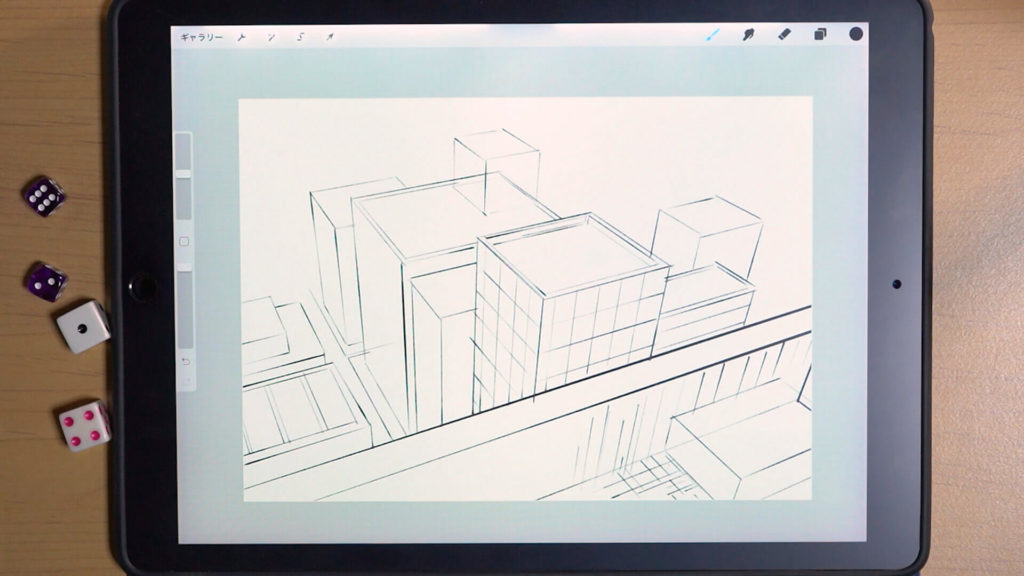
It is often used in illustrations that express height, such as a scene looking down on a building from above.
[adchord]
Detailed Explanation Video
The video provides detailed explanations. If you want to check it out thoroughly, please click here.
Conclusion
This time, I explained the “2-point perspective” and “3-point perspective” of the perspective method.
Compared to the previous video on a 1-point perspective, the level of difficulty is a little higher, but basically, if you can draw 1, 2, and 3-point perspectives, you will be able to draw almost all Environment Art!
Please be aware of the eye level and vanishing point, and aim to improve little by little.
We hope you enjoy drawing Environment Art!
Thank you for watching until the end.
See you at the next class!