I am Ari, a Concept Artists.
In this article, we will explain “How to draw a background based on a photograph using one-point perspective”. By learning this method, even beginners will be able to easily draw one-point perspective.
For a one-point perspective, choose a street that continues to the end of a single street to make it easier to draw.
The equipment and apps used in this article are iPad and Procreate; please try Adobe Photoshop, CLIP STUDIO PAINT, and other apps as well, as you can also draw by applying the concept.
If you are not sure which illustration app to use, please refer to this page. Here is a summary of recommended apps.
The video provides detailed explanations. If you want to check it out thoroughly, please click here.
[adchord]
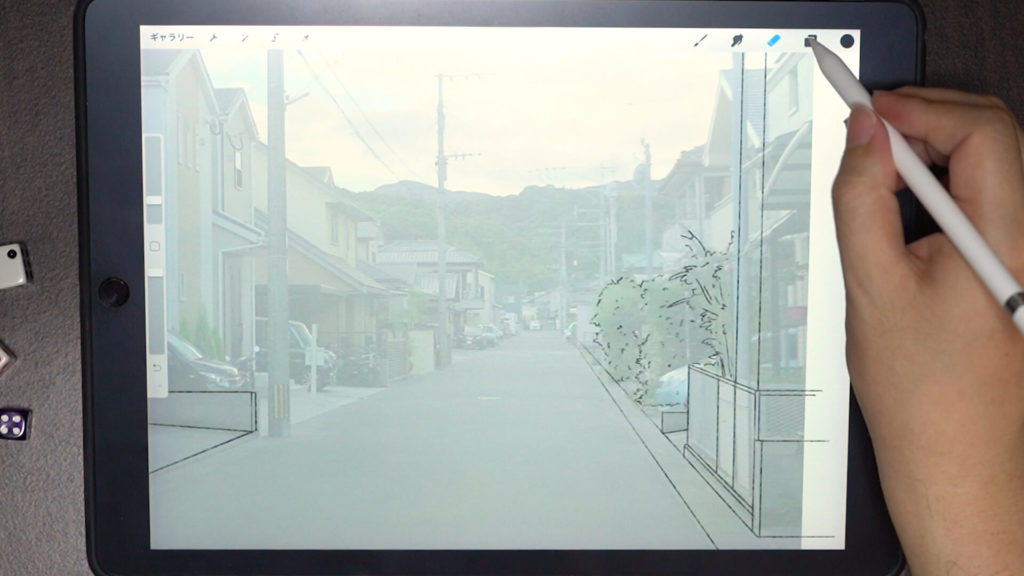
Inserting a photo
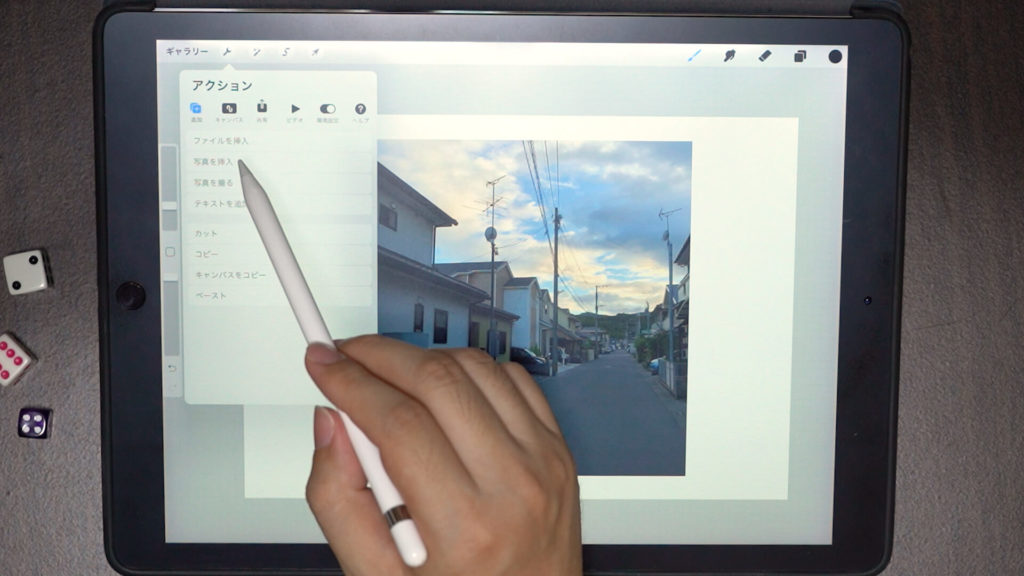
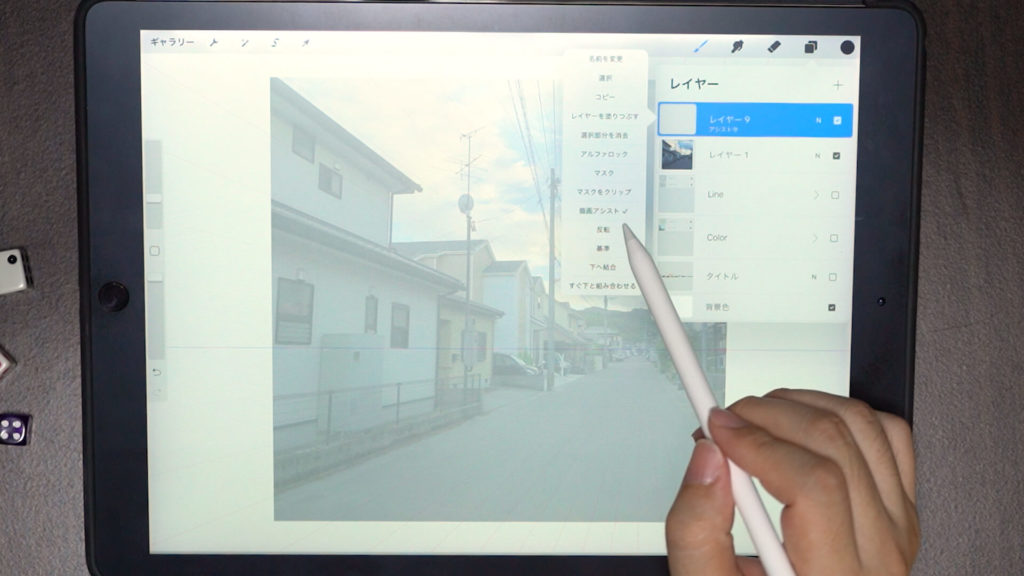
Place the photo you want to use as a reference by clicking “Action” -> “Add” -> “Insert Photo” (the spanner symbol in the upper left corner).
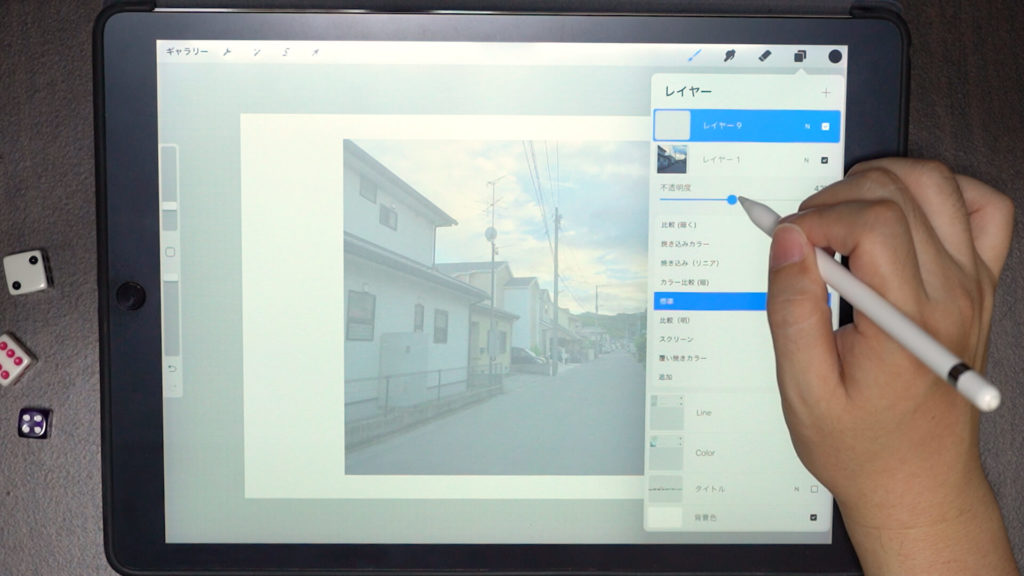
Lower the transparency of the photo layer to a value that makes it easy to draw. (In this case, the transparency is set to 39%.)
Turn on the drawing guide.
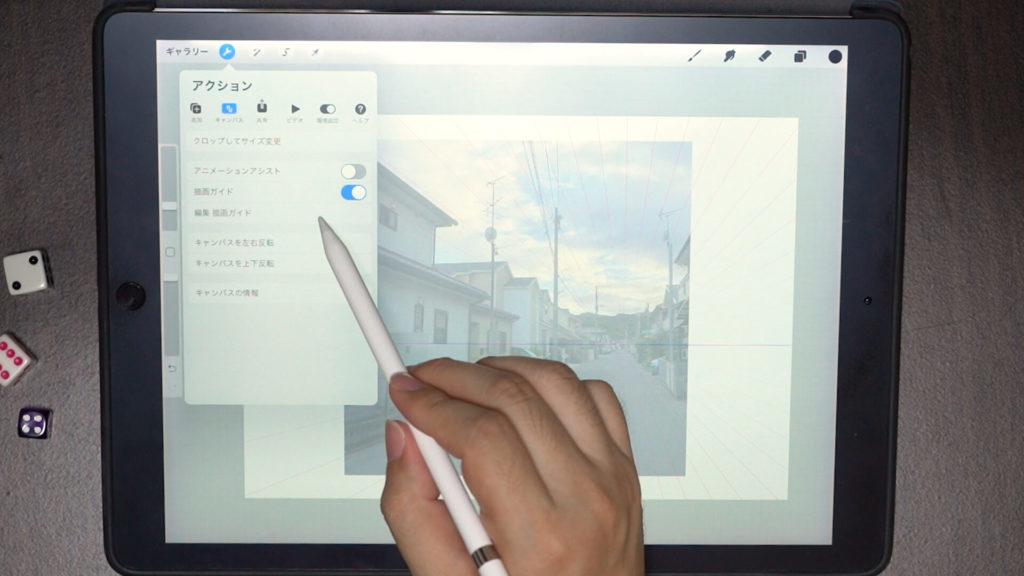
Turn ON the “Edit Paint Guide” in “Action” -> “Canvas” -> “Edit Paint Guide”.
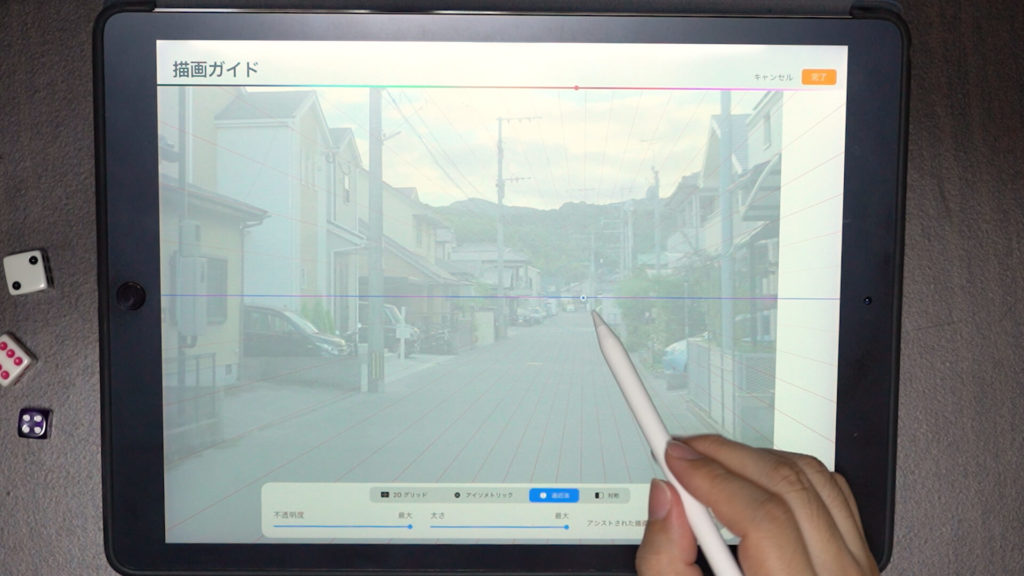
This drawing guide allows you to set the eye level and vanishing point. When drawing, it is recommended to lower the opacity to make it easier to draw.
For more information on eye level and vanishing points, please refer to this article.
→What are perspective and one-point perspective? Environment Art Rudiments
[adchord]
Drawing Line Art
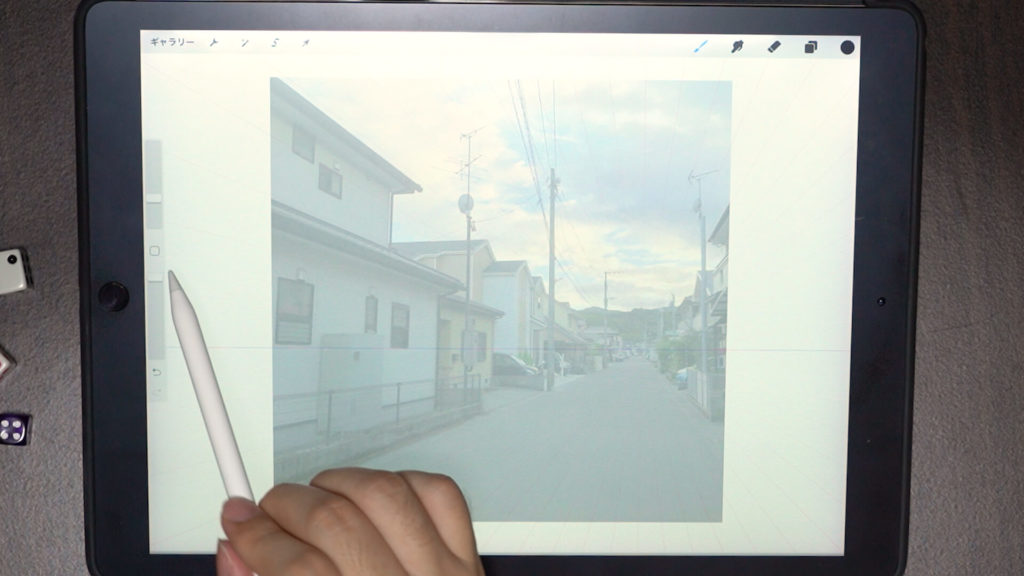
Adding a Layer
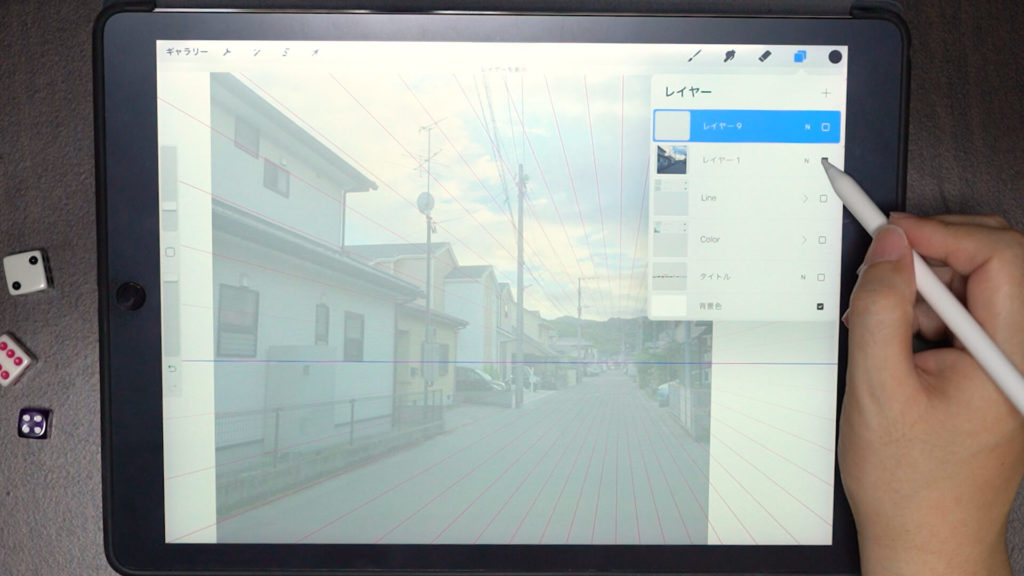
Add a new layer for line drawing on top of the photo layer. Do not draw directly on the photo layer.
For this tutorial, we will use a single layer, but it is recommended to separate the layers for ease of modification and coloring later on.
Turn on drawing assist
Tap the layer on which you want to draw the line drawing, then tap “Drawing Assist” and put a check mark in the box.
Since “Drawing Assist” is frequently turned on and off, it is convenient to set it as a shortcut. In my case, I set it so that I can turn it on and off by pressing the square button on the left.
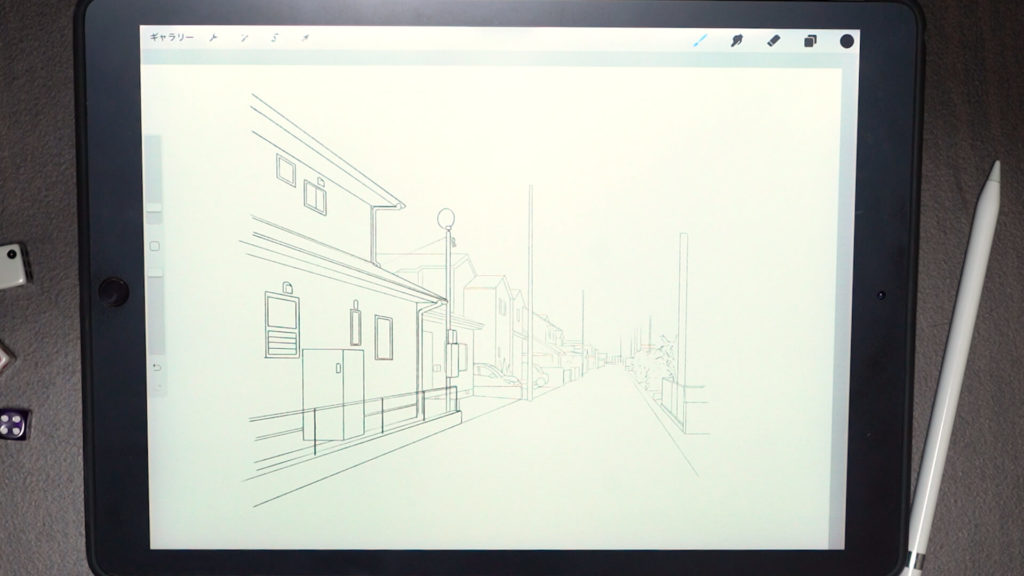
Drawing a line drawing
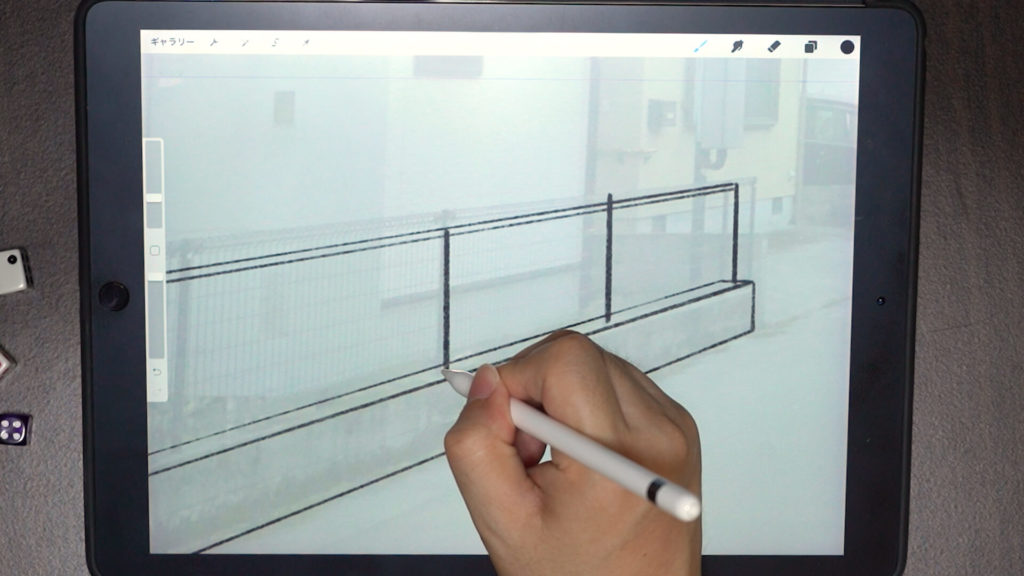
Use “Sketch” -> “Pencil 6B” for the brush. Set the line thickness to your preferred thickness and draw in order from the front.
With the drawing assist turned on, you can draw the background by simply tracing over the photo. If the background is not in the right place, you can erase it, so do not worry about it. If the eraser behaves strangely, turn off “Drawing Assist” to return to normal.
Turn off “Drawing Assist” except for straight lines and continue drawing line drawings.
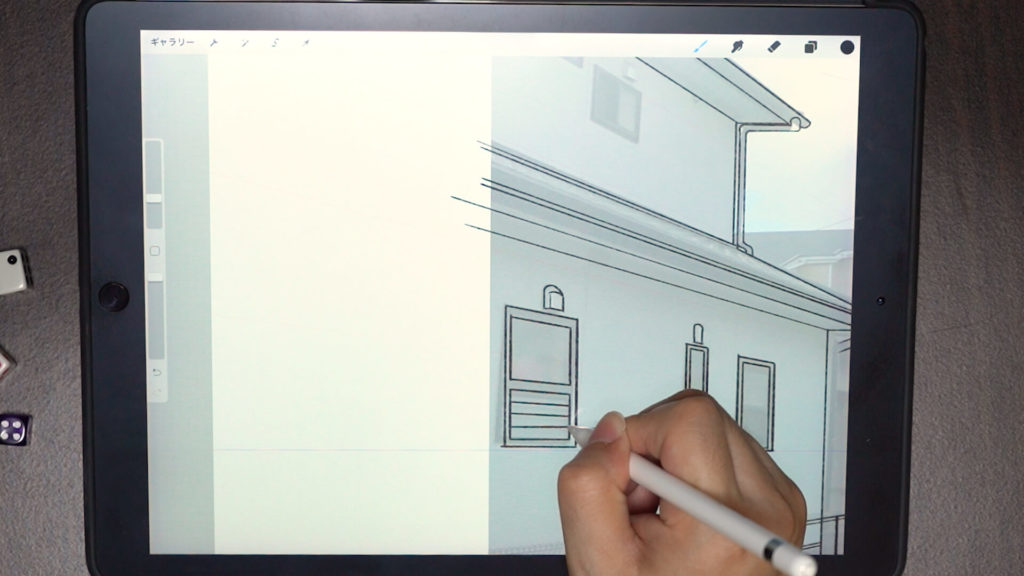
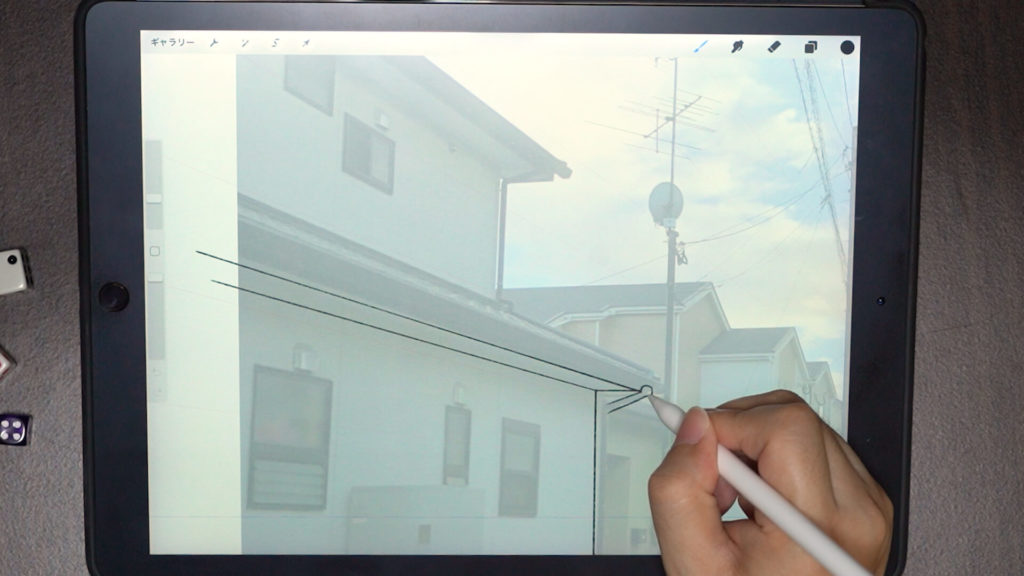
The windows are also drawn in a simplified manner. Personally, I don’t think it is necessary to draw too much. I think it is fine if the windows are not drawn in too much detail.
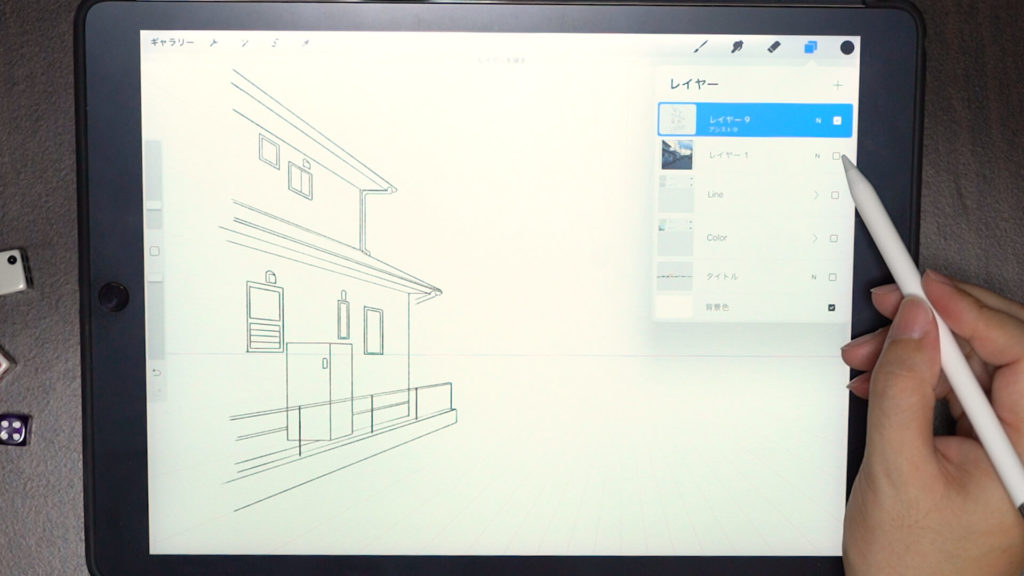
The house in the left foreground has been finished. To check the line drawing, hide the layer photo and look at it.
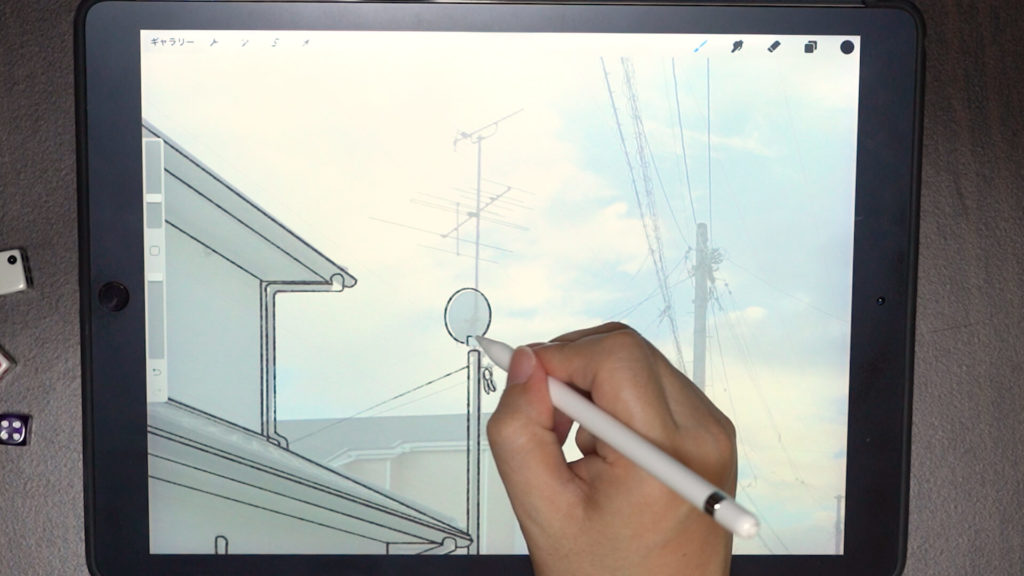
Try to simplify the electric wires and so on where you can.
The further back you go, the thinner the line should be drawn. Thinner lines will give a sense of perspective.
In this case, the left side of the building will be the main subject, so the buildings on the right side will be simplified.
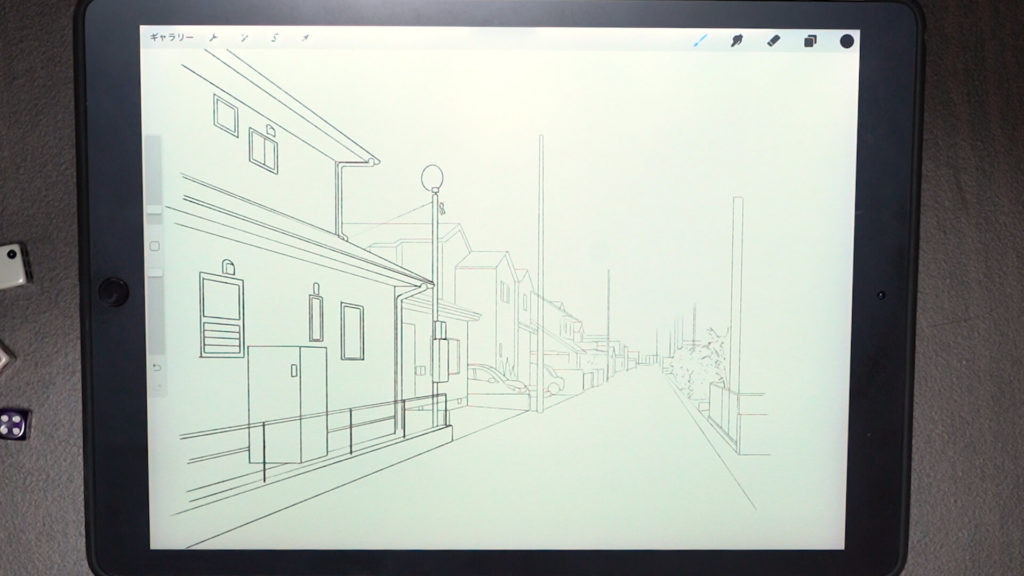
If you draw too much at the back, the amount of information will be too much and the main subject will not stand out, so it is fine to use only simple lines at the back.
[adchord]
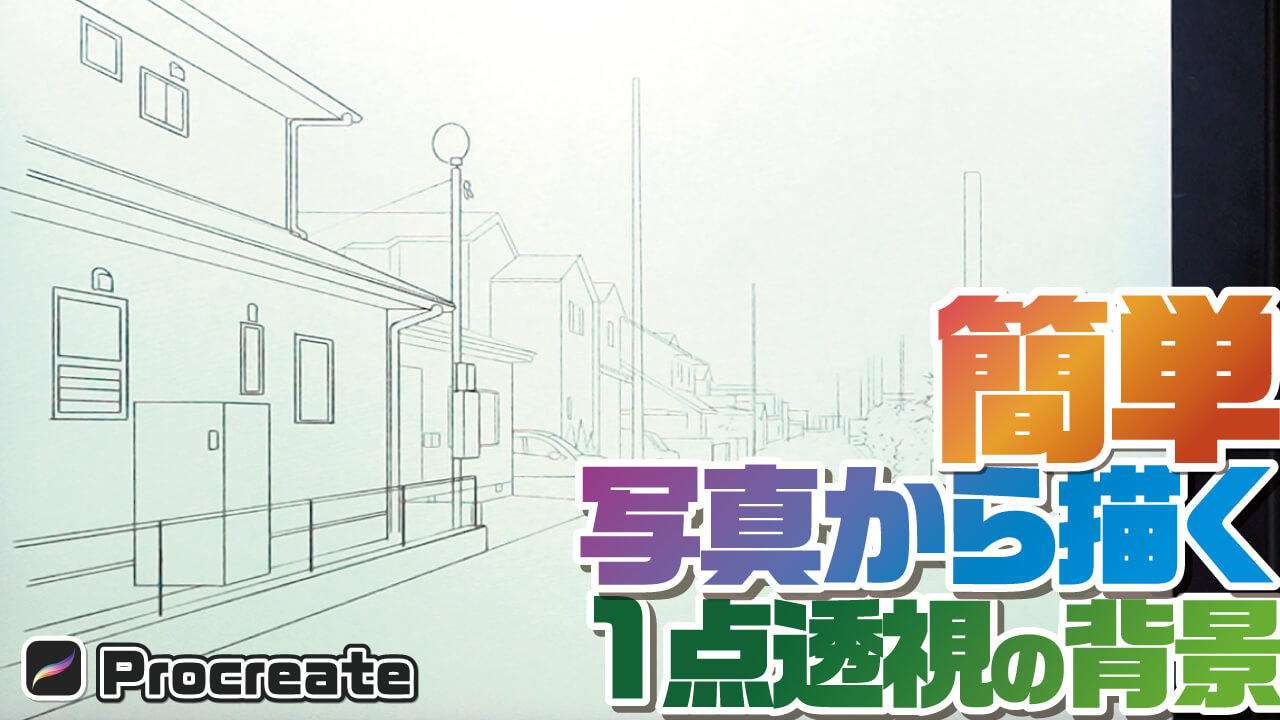
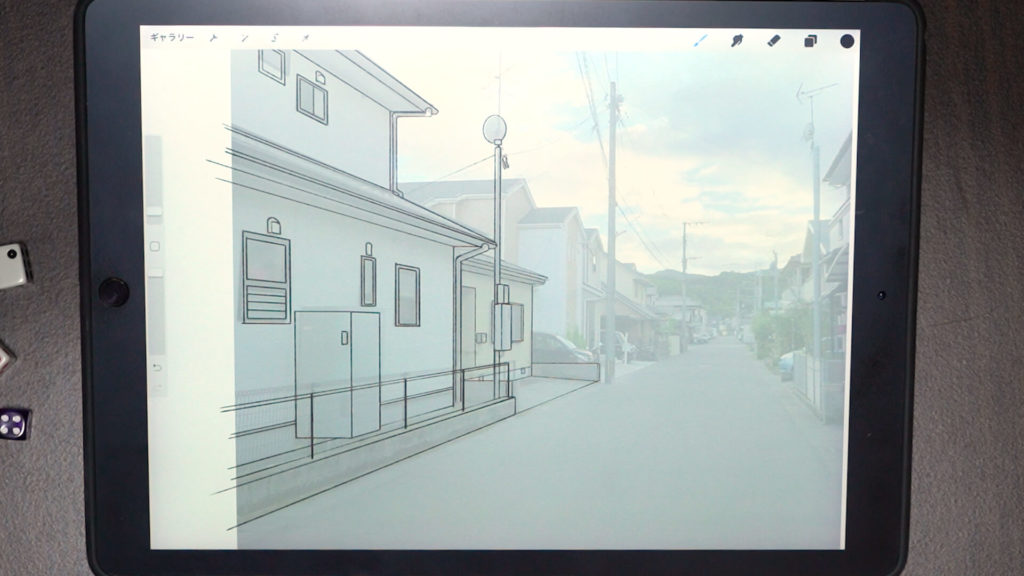
Line drawing complete!
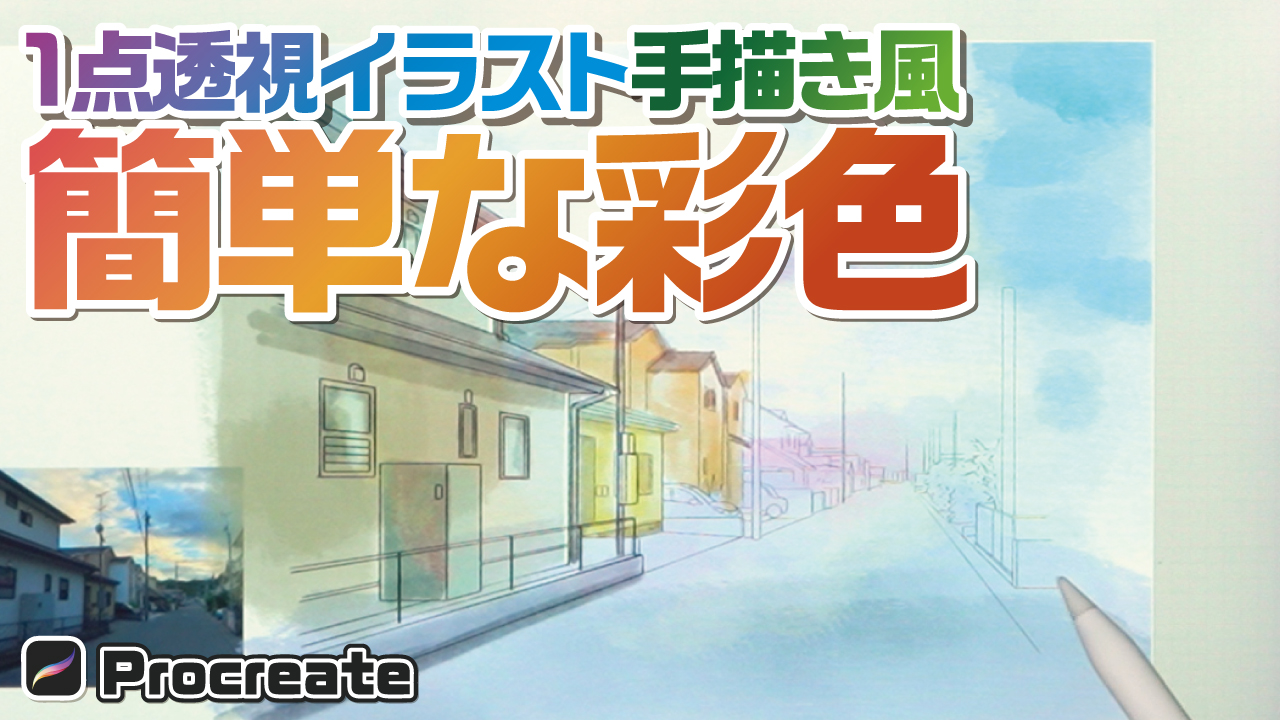
A line drawing could be drawn based on the photo.
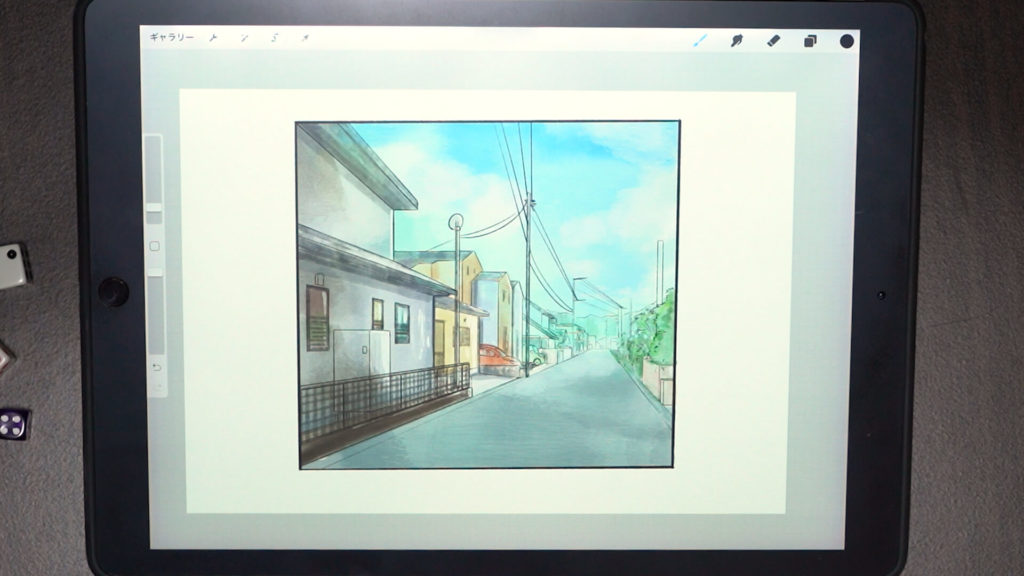
A simple color can be added to this line drawing to create a picture like this. We will introduce recommended brushes and other tools for drawing this kind of illustration in the next issue.
Detailed Explanatory Video
In the video, we explain in detail while drawing. If you want to check it out thoroughly, please click here.
Related articles and videos
To learn more about one-point perspective, eye level, and vanishing point, please see the following videos and articles.
→What are perspective and one-point perspective? Environment Art Rudiments
Summary
In this article, we have discussed “How to create a one-point perspective drawing based on a photograph.
If you draw while being conscious of “erasing unnecessary parts” and “not drawing too much in the back”, you can draw a one-point perspective picture with depth.
By practicing on a photo, it is easy to understand where the eye level should be, so this is a recommended practice method.
Thank you for watching until the end.
See you again in my next post!